Whelp…
I finally visited my car after a year. Yay?
This was a weird trip… some big ups, lots of annoying downs… but all in all, a corner has been turned.
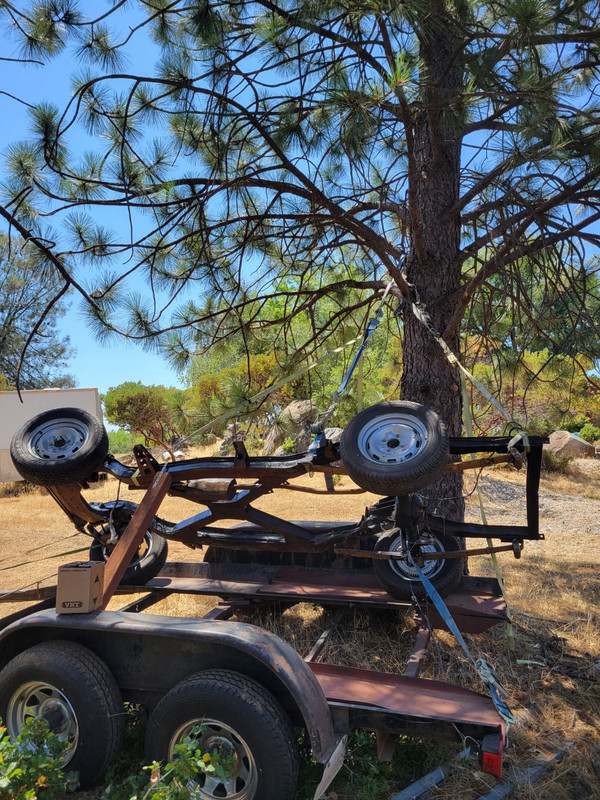
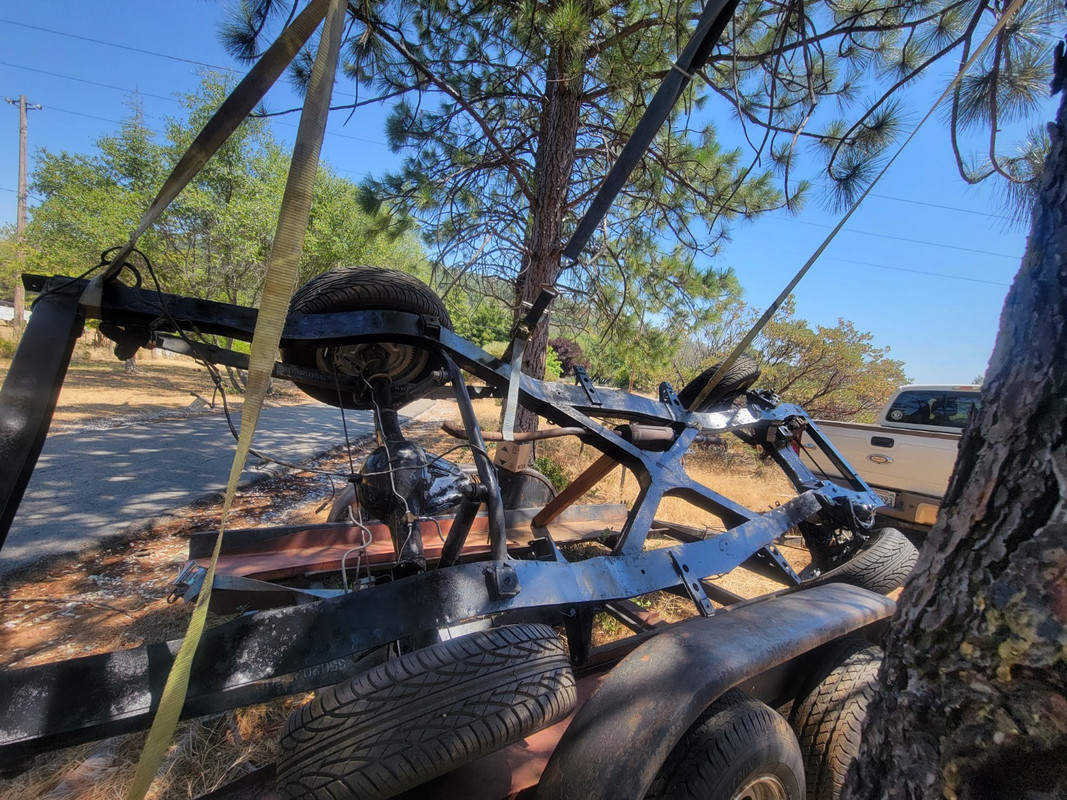
The ‘work’ actually started a couple of weeks before I even flew up there. I enlisted my nephew to help with the chassis project. He towed the frame to my brother’s house and he power-washed and degreased it. He then set up a hoist system with tie-downs and painted the frame with Chassis Paint. The frame was in great condition, so he just made sure to get it clean and nice and sealed. It’s not quite a sandblasted- and powder-coated-beauty, but he did a great job, and I nor my daughters will ever have to deal with frame rust. This is a realllllly good feeling.
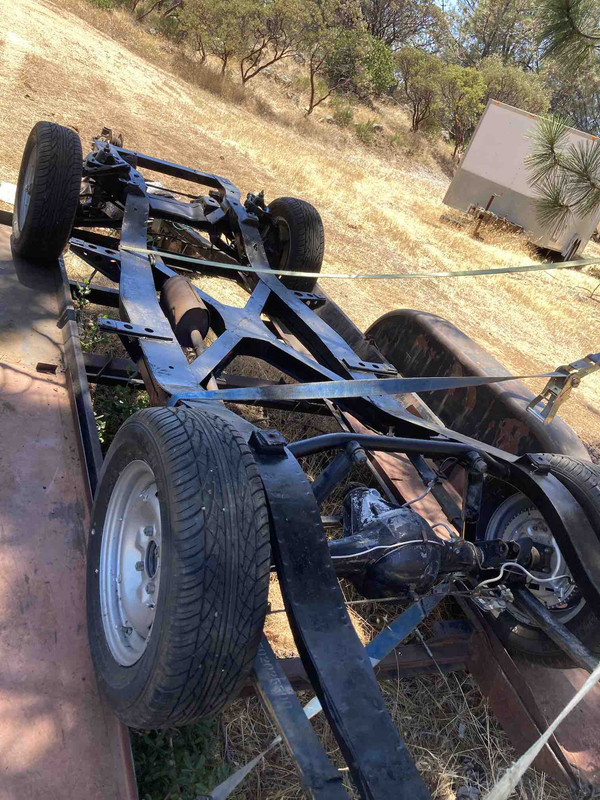
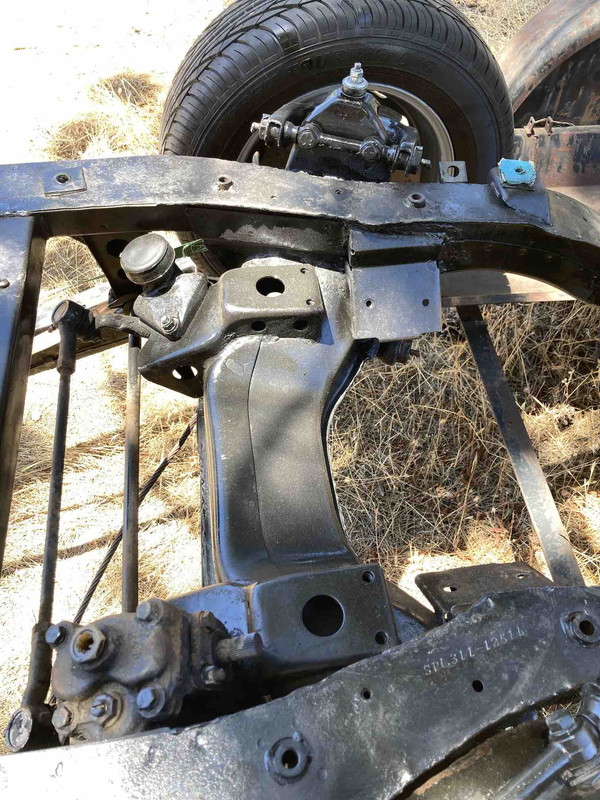
Ahead of the trip, my brother and nephew also worked on the suspension design. My brother has always been planning to do coil-overs all around, and according to him “The front is easy. The rear is a bit more complicated…”
This is my brother’s livelihood, and my nephew is way into it, too. But I’m obviously just learning this stuff, and they’ve been very patient with all of my dumb questions. In turn, they’ve asked me all about what I want, what I expect, how I’ll drive, who I’ll drive with, etc. They went on to calculate spring rates, research shock options, mounting points, etc. They even got as far as prototype CAD designs that were laser cut and delivered when I was up there. This is cool stuff to learn about, and exciting to watch the process. So, the fact that it’s actually happening is huge.
Day 1 – As usual, the first day was just finding and organizing the crap I’ll need to hopefully achieve my plan. I found the two piece drive shaft, the thicker transmission plate, my NOS heavy-duty pressure plate and disc, lightened flywheel, new motor mounts, frame padding, headers, etc. Found the package that JT sent up with bolts, shifter pin, breather, and header gasket. Thanks JT.
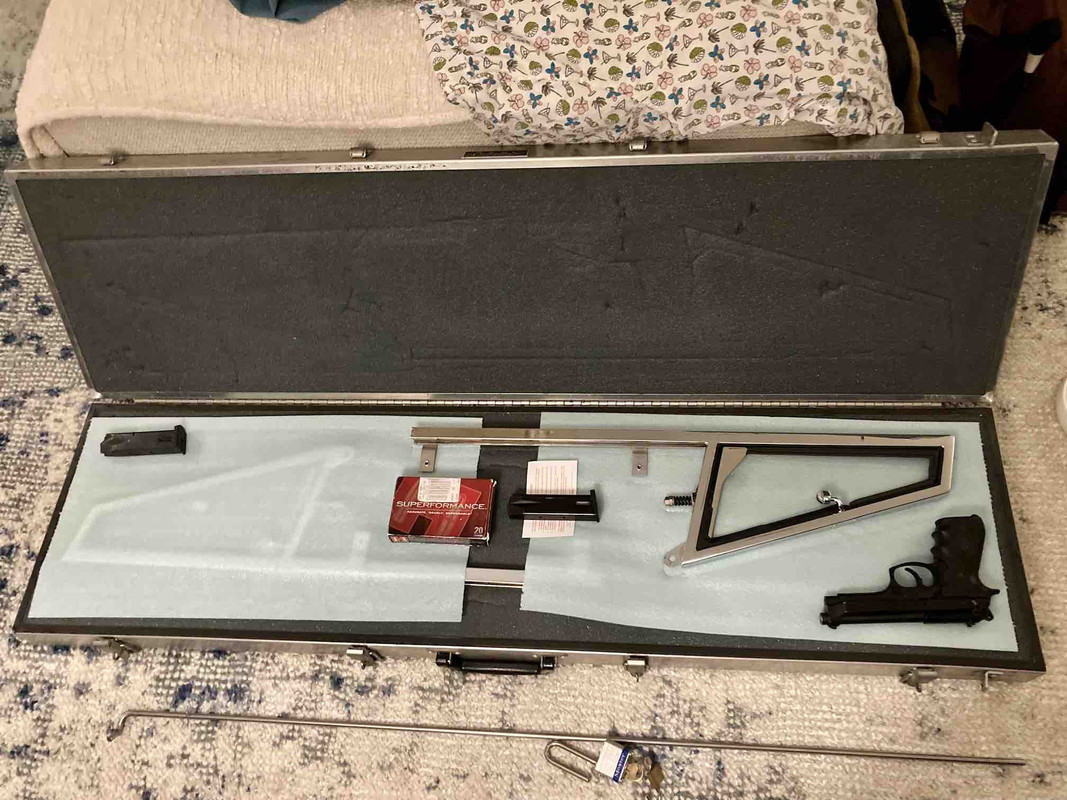
I was also able to bring up my completed wing windows. That felt pretty good. And I'll remind all of you that if you fly with your wing windows in a gun case without a firearm in it... it is then considered oversized luggage and will cost you $75. Sooo, my workaround – a big ol' case with a pistol and the wing windows.
Day 2 - Saturday - Went to a family reunion that was an absolute blast. It’s been a long time and was great to see all of my cousins.
Day 3 - Sunday - Cleaning day… meaning I was just going to clean and prep parts. So, I spent half the day at my brother’s shop, using the parts washer for the drive shaft, and a bunch of other stuff, at the same time, I put a bunch of parts in the tumbler, and while that was all going on, I sandblasted a whole bunch of stuff, the transmission plate, motor mount brackets, alternator mounts, and a couple of things I don’t even know what they are.
After about 4 hours of that, I felt really, really good. It was amazing to think that I’m no longer tearing stuff apart to put in a box, but rather cleaning up parts to reassemble. Amazing feeling… but short-lived…
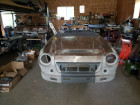
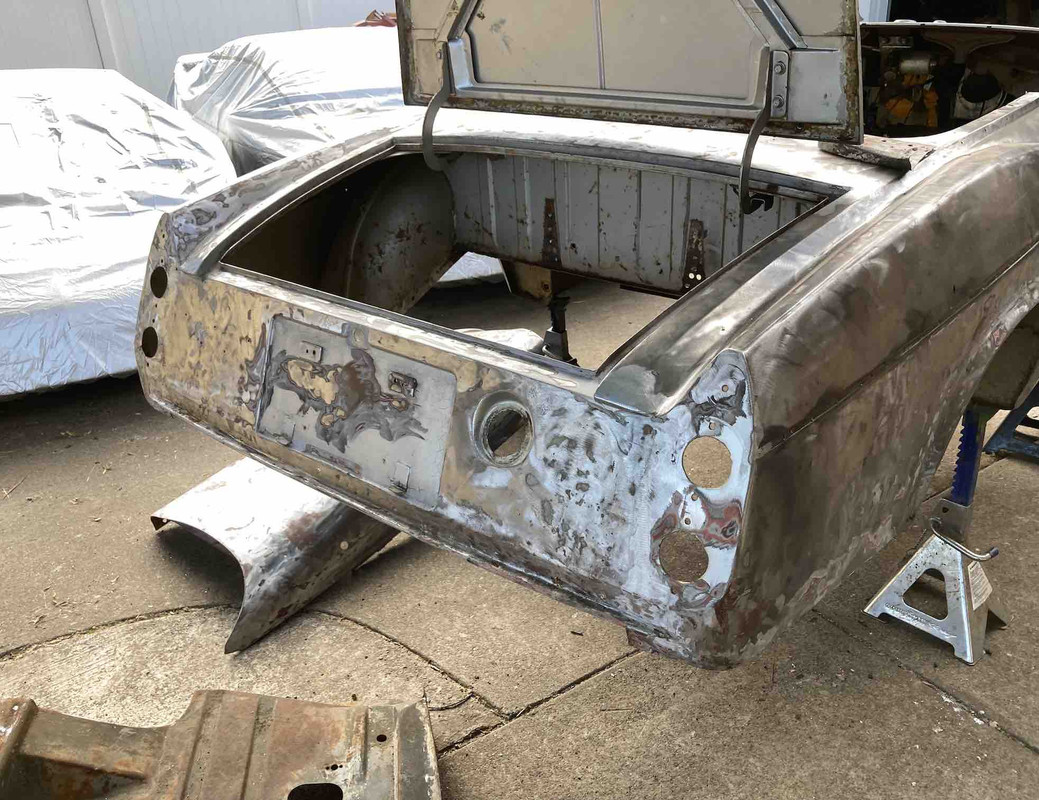
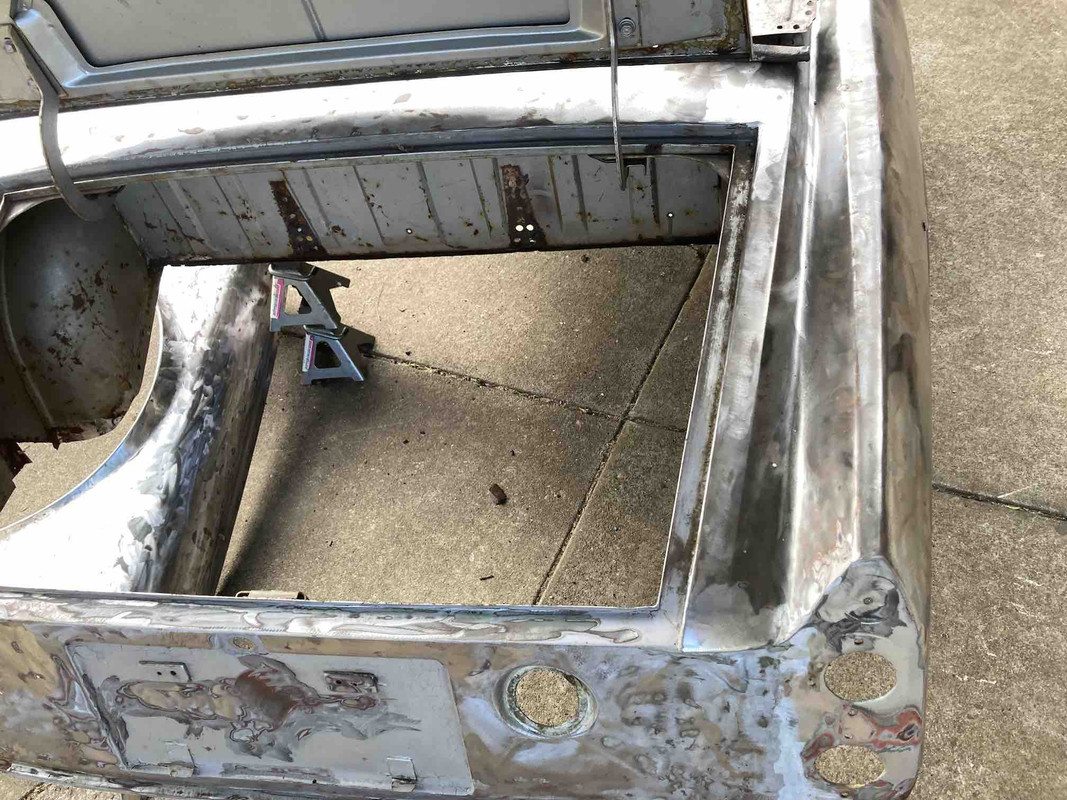
On the way back to my brother’s I stopped by to see the body and paint progress. Progress is happening, the body is pretty much stripped to bare metal, every dent is pounded out, and the headlight scoops fit perfectly (stupid me didn’t take a photo)! All of the rotted trunk areas have been cut out and squared up. The patches needed from the donor rear clip have been cut out and squared up. They showed me how they’ll all fit together and I am super stoked at the work they’re doing. They’re doing this right, like the guys on TV – better than I could have hoped for.
The downer was seeing all of the disassembled parts that I had been ignoring… all the door and window guts, the wiper assembly (which if you recall, I butchered out of frustration), the locks, the latches, and catches, etc. Seeing all of those parts, and thinking of what I’ll have to do to prep and reassemble them, frankly overwhelmed me.
It was awesome seeing the body progress, but the volume in the parts bin was a bit of a buzz kill… especially after the awesome cleaning day that made me think I was closer than I actually am. The door and window guts alone terrify me.
Day 4 - Monday - This was supposed to be the big day – assemble and bolt together the engine, clutch, and transmission and drop into the chassis! But frankly, it was kind of a shitshow on my part. It started out okay, I spent the morning scraping and wire wheeling the driveshaft, which I took up to a drive shaft and muffler shop for them to balance and install my new U-joints. I got that all dropped off okay, took a while, though, and I headed back to the shop to get back to my goal.
The obvious start is to bolt on the clutch, and for that, I had JT’s flywheel bolts which I knew were correct, so that’s a no-brainer. Per JT’s recommendation, I was torquing to 55lbs and the wrench I was using just wouldn't click... but, since I didn't want to bug my brother any more than I already had, I kept going... kind of wincing as I really reefed on it. I finally decided I needed an experienced second opinion and stopped. A bad torque wrench? Donovan came over and confirmed that it was waaaaaaaaay too tight. Scary-tight. Lucky-I-didn’t-break-a-bolt-tight.
So, I went to O'Reilly's and borrowed a torque wrench. I brought that back to the shop and when I went to set it to 55, the whole wrench literally fell apart. Apparently I am cursed by torque wrenches. Back to O'Reilly's, and since they didn't have another loaner, I just bought one. Worried that I may have weakened the bolts, and lucky to have a second set, I threw away the first set and torqued the new bolts to 55. This was a lot more frustrating than it sounds.
I used the new wrench to finish the engine/transmission assembly. Nice consistent clicks – and now I can sleep at night.
After all the back and forths and inefficiencies, I had pretty much burned the day without getting nearly what I wanted to get done. So, I headed home to paint the brackets and pulley.
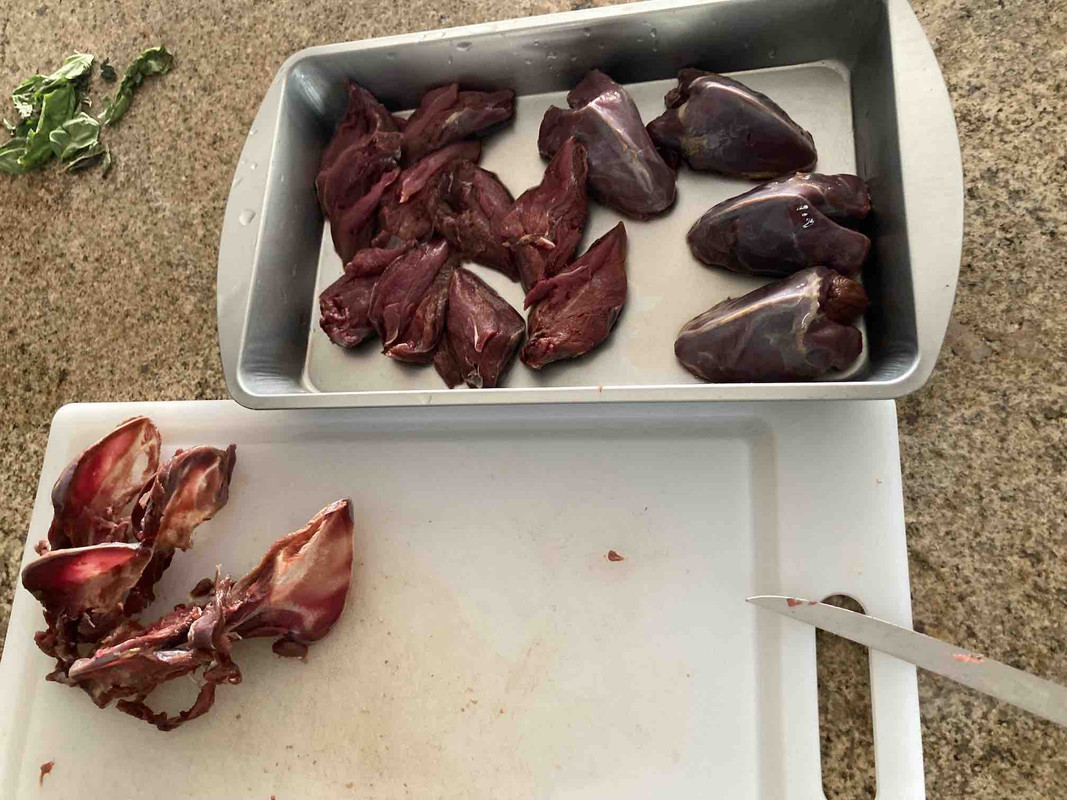
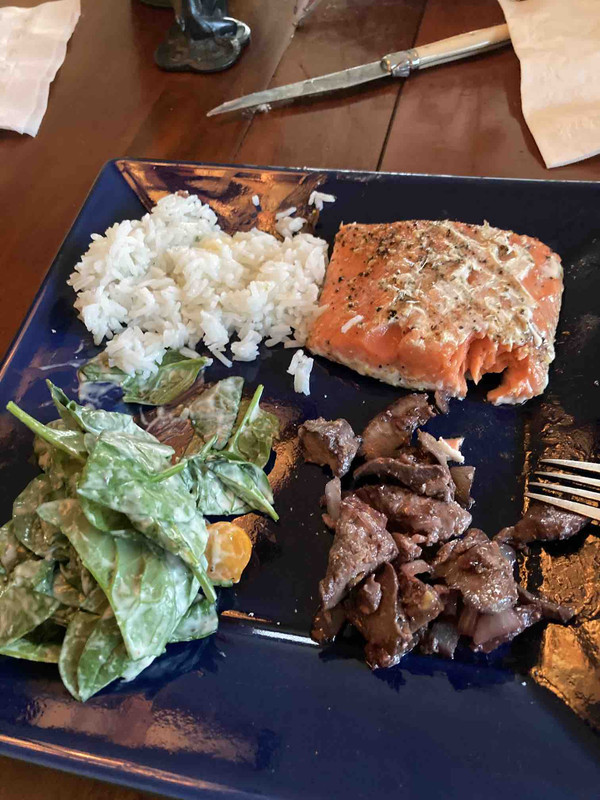
Then we got supper ready. The menu was Elk Tenderloin from my January hunt, and Oh My Gosh, it was absolutely amazing! A great way to end a frustrating day.
Day 5 -Tuesday - I was determined to be more efficient, productive, and make a lot of progress. So, I hook up the trailer and start down the small lane from my brother’s house and at the first speed bump the trailer completely jumps off the hitch. What a stellar start to the day.
Now, I’ve towed that trailer, my Airstream, my boat, etc. a gazillion times, but par for this trip, I f’d up somehow and didn’t secure to the hitch properly. I was mortified that I screwed up my brother’s trailer and that he was going to ship me and the Roadster back to San Diego. Luckily, I was only going 1 mile per hour so the only minor damage was to the electrical plug, a brake line, and the safety chain ring. I was able to get everything all hooked up properly, and when I got to the shop and told my brother, he was ridiculously understanding and just said thank god it happened where it happened. For some reason I’m still surprised that the same brother who would tie me upside down in trees when I was a kid, is now so helpful and understanding.
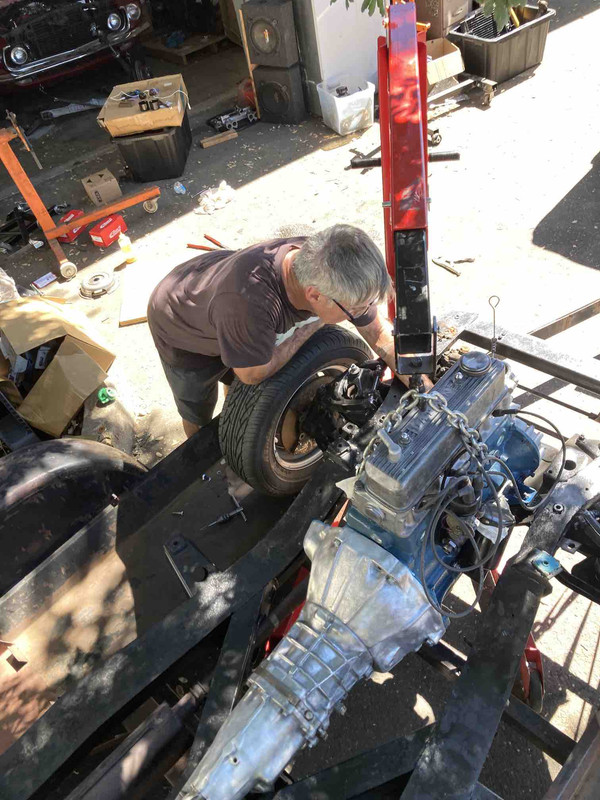
Now, back to being productive… but alas, I didn’t have any of the bolts needed ready to go. I see the size and pitch in the Datsun Sports Car Handbook and Service Manual, but not the lengths. And even with some help from 311s, I still can’t figure out how to determine what the exact bolt specs are. And trying to figure that stuff on my phone makes me want to stab my eyeballs. But, again, my brother was a hero that day. He’s like many of you - he can look at a nut, bolt, or hole, and know what size it is. On top of that, he has almost every bolt in stock. And for the ones he didn’t have, he personally ran up to the store to buy them… “You’ll take too long…” he said. Yeah, true.
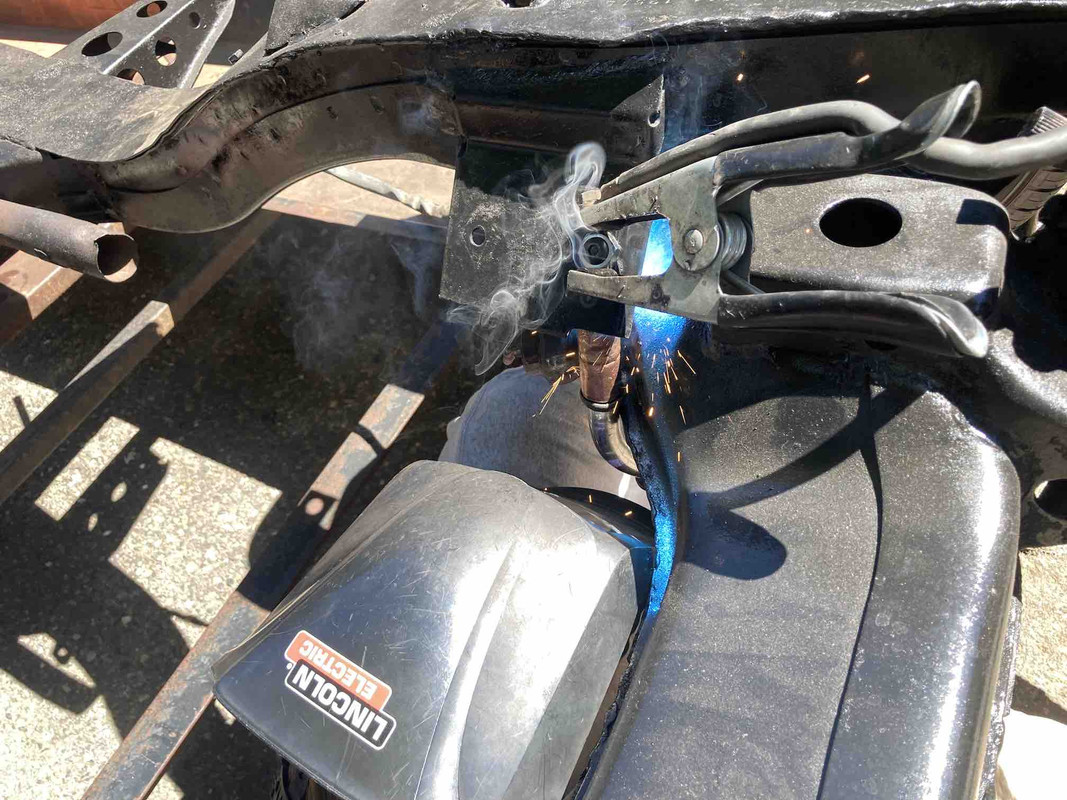
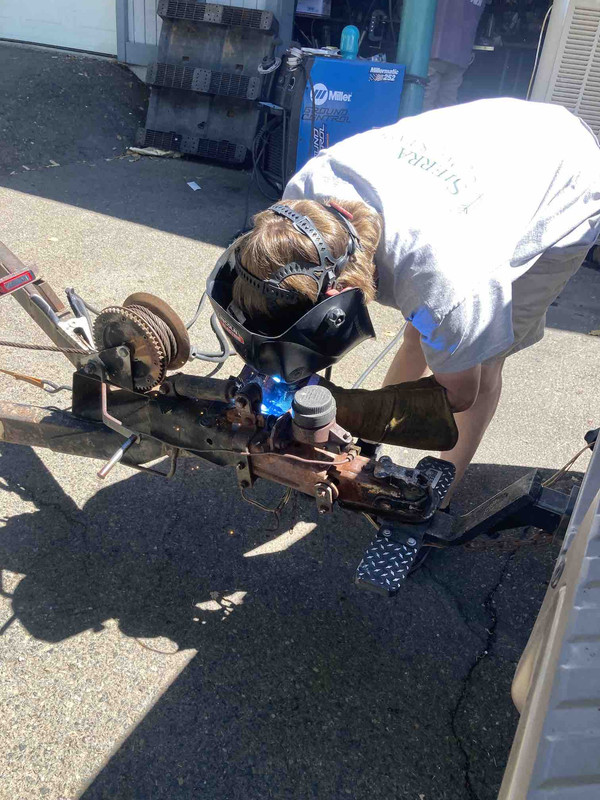
While we finished bolting up the engine and trans, and chased all of the threads on the chassis, Dave the welder hopped in and welded on a broken captive nut for the motor mount, and also welded the safety chain ring back to the tongue of the trailer. Jeez, I felt like an idiot.
And then… the skies parted and the angels sang… we hoisted the engine/trans up and dropped it into the frame! A giant moment for me.

Once that was done, I raced to pick up my driveshaft that was ready. Looked awesome, and cost way less than I thought. About the only thing that went as planned this trip.

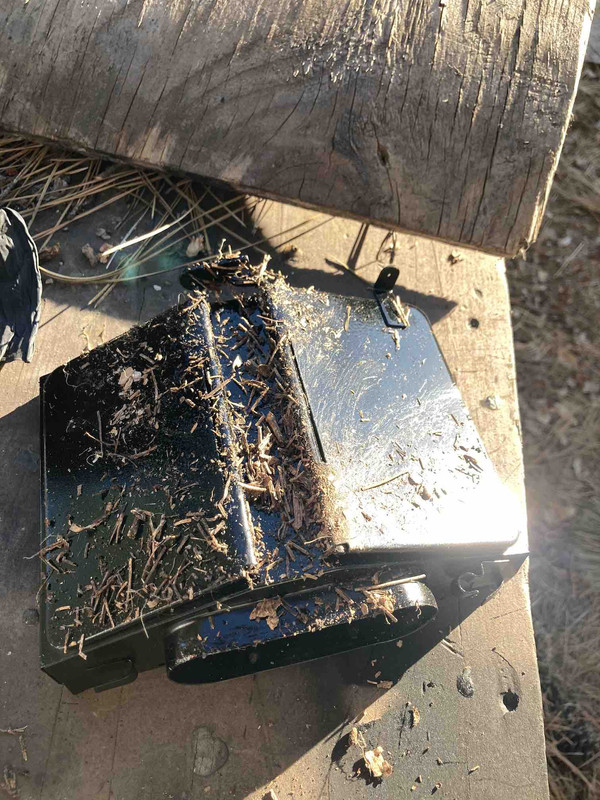
Before dinner, I thought I’d paint my heater box that I’d sandblasted. I’m not very good at spray painting, I’m too impatient, but I was nailing this! It was looking really, really good… but I just needed one more coat on one little part on the back side of a vent which no one will ever see. So, I reposition and give it a quick little spray, and blow the entire thing off the bench into the pine needles. I can’t f’n believe it. Told you this trip had a lot of downs.
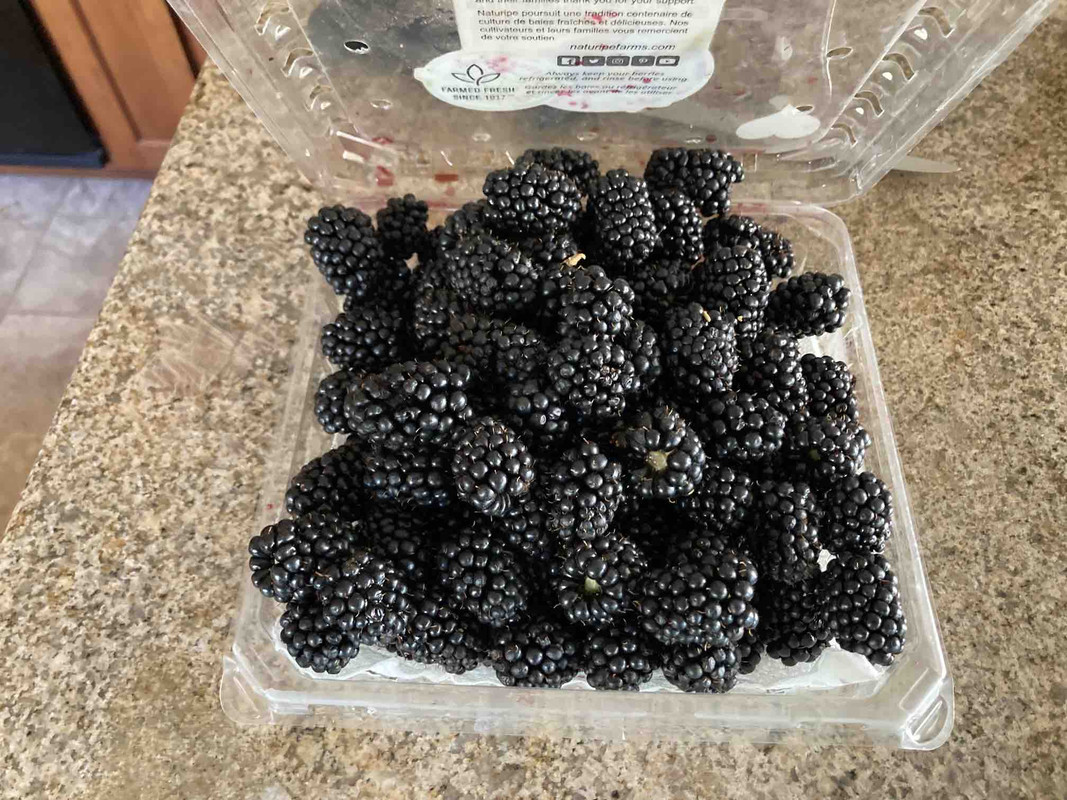
Another amazing dinner helped ease the pain. Grilled salmon, and dove breast seared in shallots, garlic, butter, and deglazed with fresh blackberry jam from my sister-in-law’s garden. Amazing.
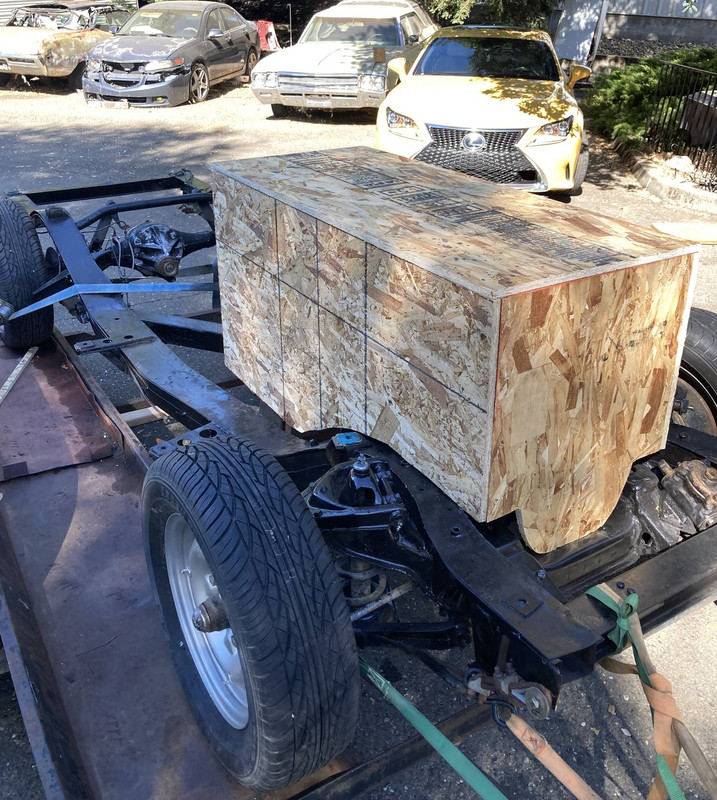
Day 6 -Wednesday - My ‘last’ day. The plan for today is to build a ‘coffin box’ to cover and protect my engine so my brother can work on the suspension and not worry about it too much. Off to Home Depot and did some woodworking. We made a pretty respectable box all things considered. I think I’m better with wood than with cars. Once that was done, and being very tight on time to catch my flight, I frantically started packing up. This is another huuuuuge bummer about being so far away. Every trip, I spend at least a half day pulling everything out and then another half day, storing everything away, so it’s not in anyone’s way. I lose a day at least, and it’s always a panic to make the hour trip to the airport on time. I put away my stuff the shop, then raced to my brother’s and started putting all of those parts away. Soon after, I realize there is no way I’m going to make it. So, I changed my flight and took everyone out to a really good sushi dinner.
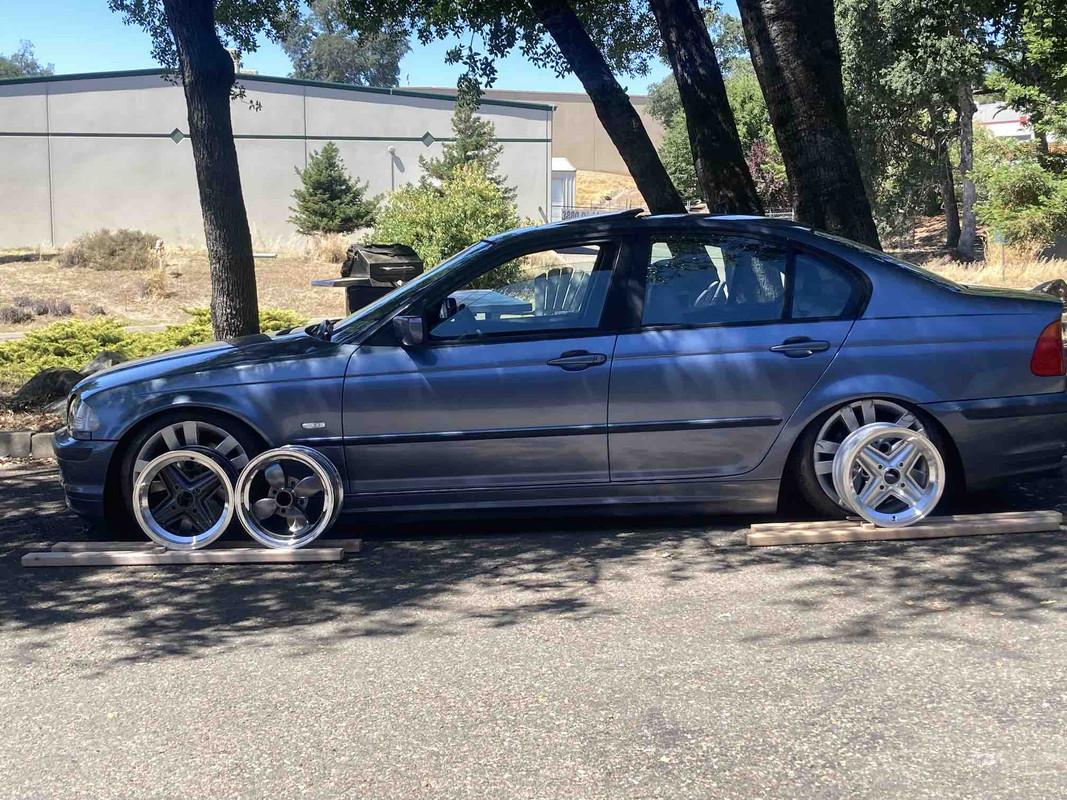
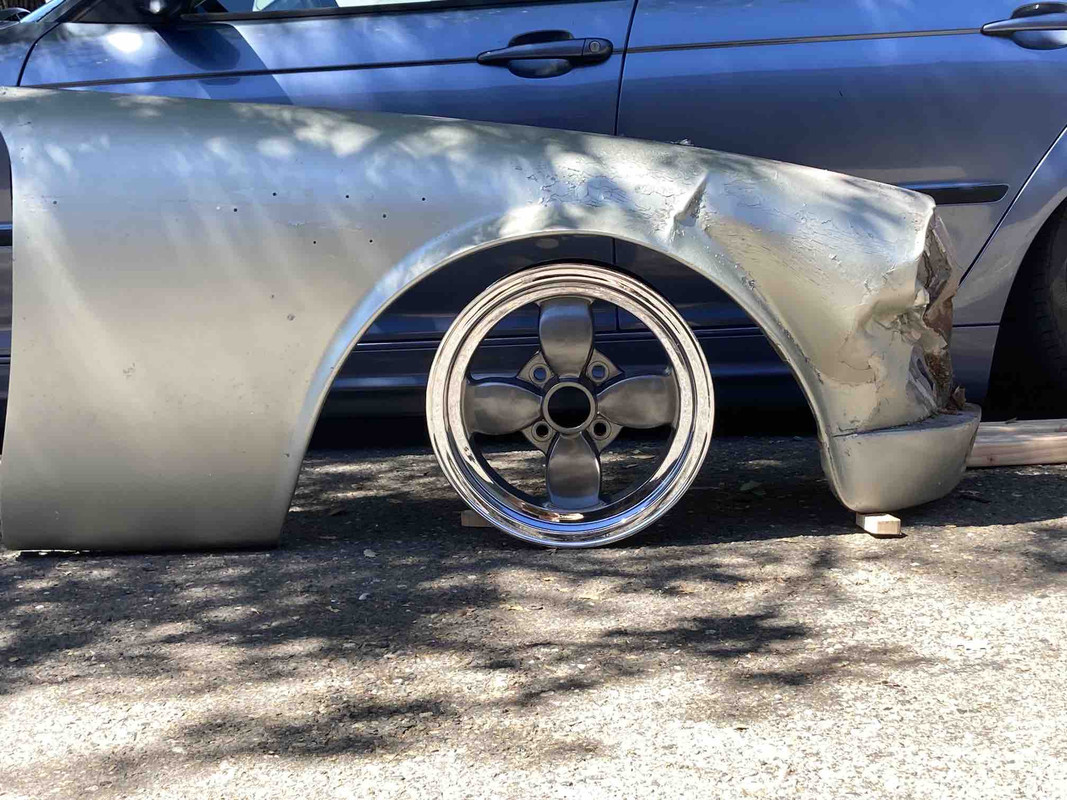
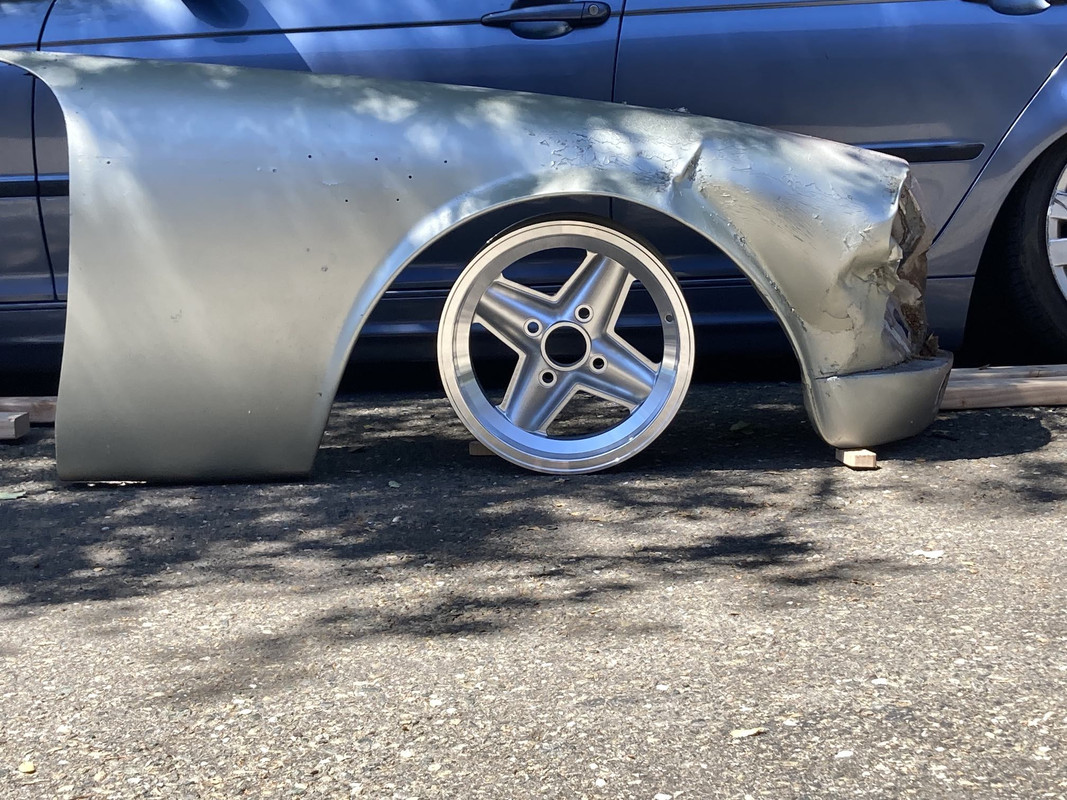
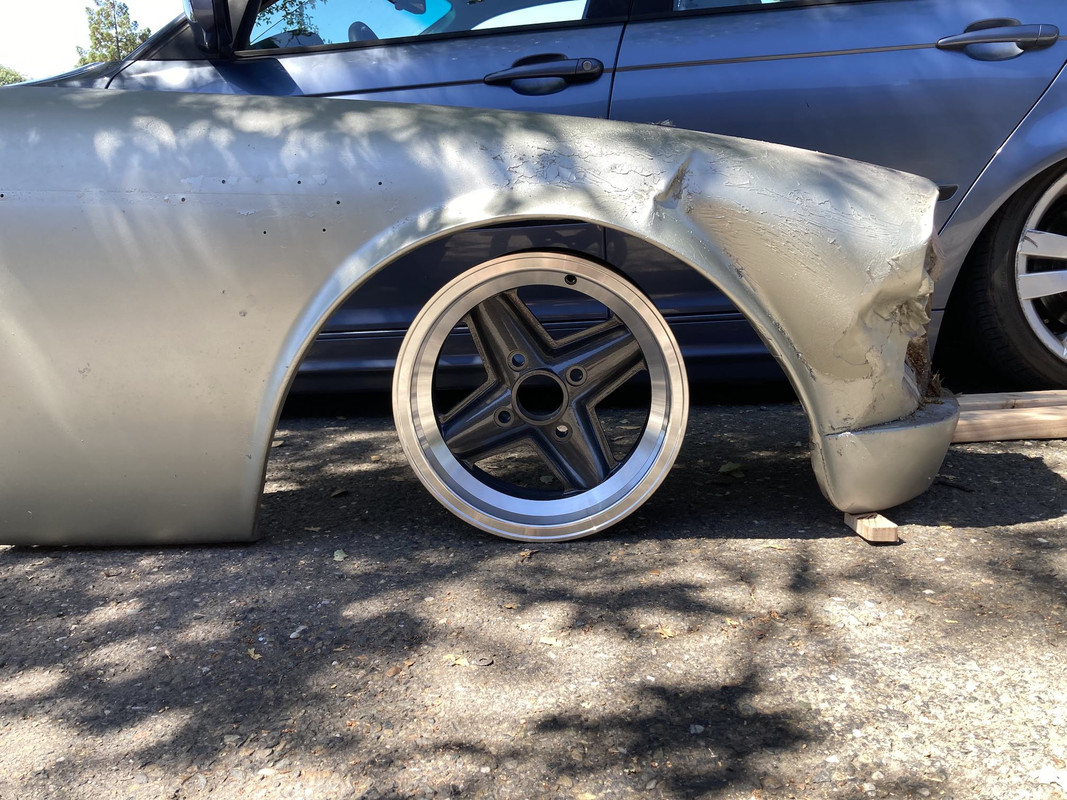
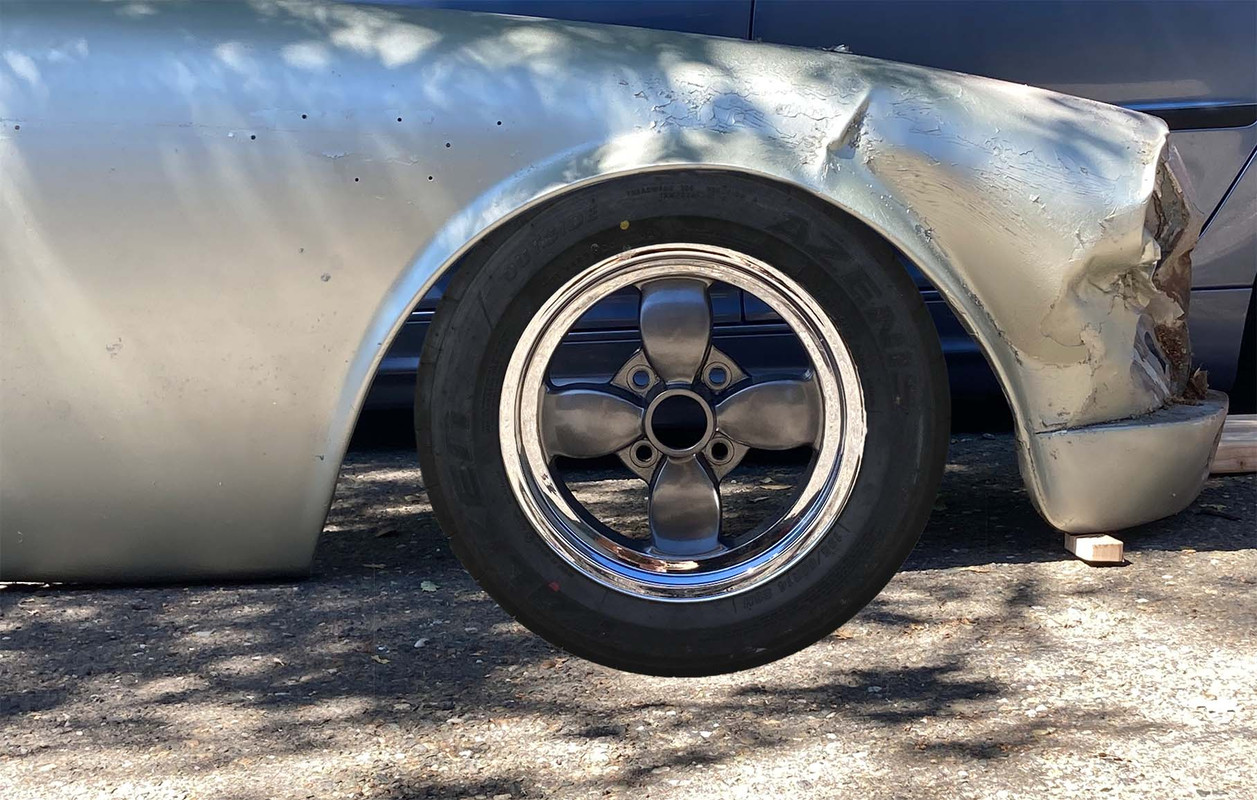
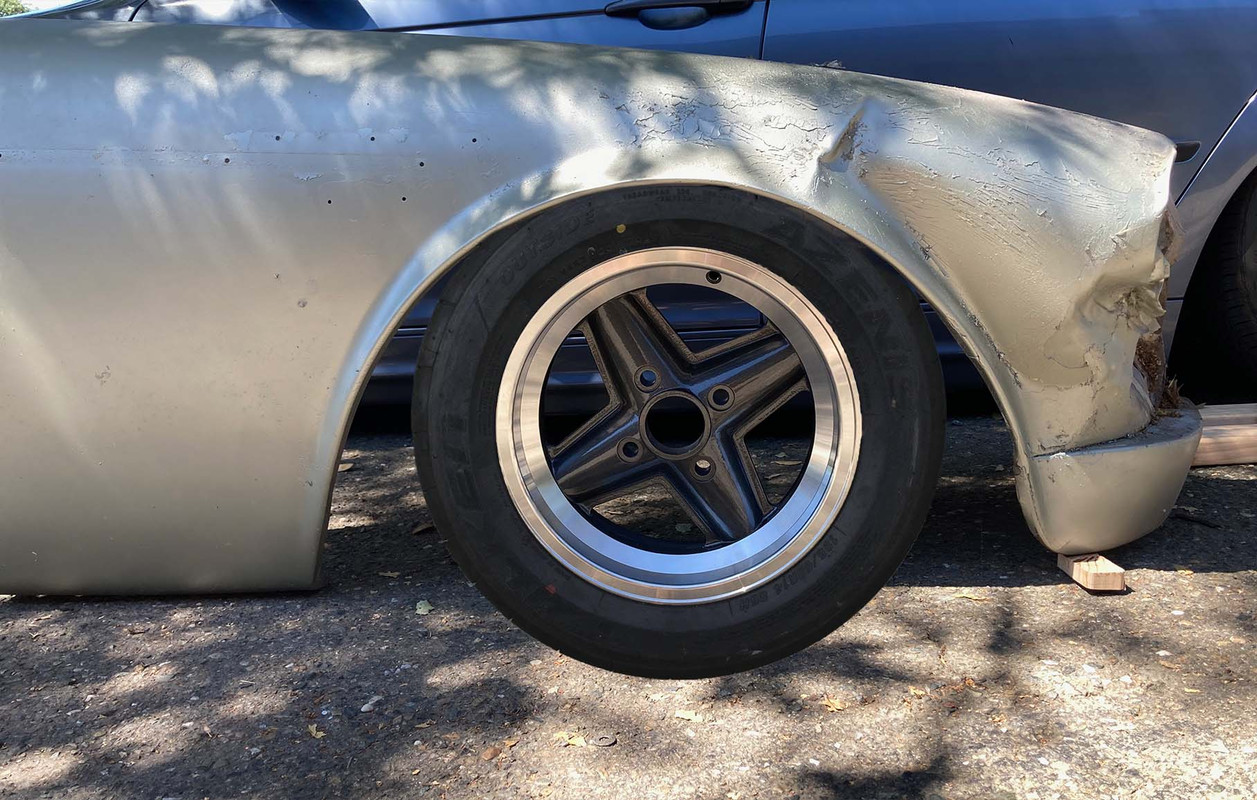
Day 7- Thursday - ‘Bonus Day’. Rewind to the afternoon before… I found a buyer for my original steel wheels, so that means I need to finally make a decision on what wheels I want to run. That’s kind of fun and is pretty hard to screw up, even for me. I had pre-shipped my restored Libre-style wheels, and I pulled out the two NOS sets of Revolution 4-Spoke Wheels. I also grabbed my original crunched fender and painted it with a leftover bomb can of my paint color to gave it a quick coat so I could see the wheels against the color of my car. I brought everyone out to get some opinions, and there wasn’t really a unanimous #1, but everyone did agree that the Libres were at least really good. So, for now, that’s what I’m running. I dropped those at the tire shop to have the tires mounted. The following day, my nephew picked them up, and swapped them out with my original steelies to get shipped to the buyer.
Back to the wheel selection… I felt pretty good about the Libre decision. But that decision was made without tires mounted. When I got home I did a little photoshopping, and now looking at them with the tires on, it makes a big difference and I can’t decide which I like best. I like them all very much. Hmmmm… any thoughts from you people?
WITHOUT TIRES
AMAZING PHOTOSHOPPED TIRES
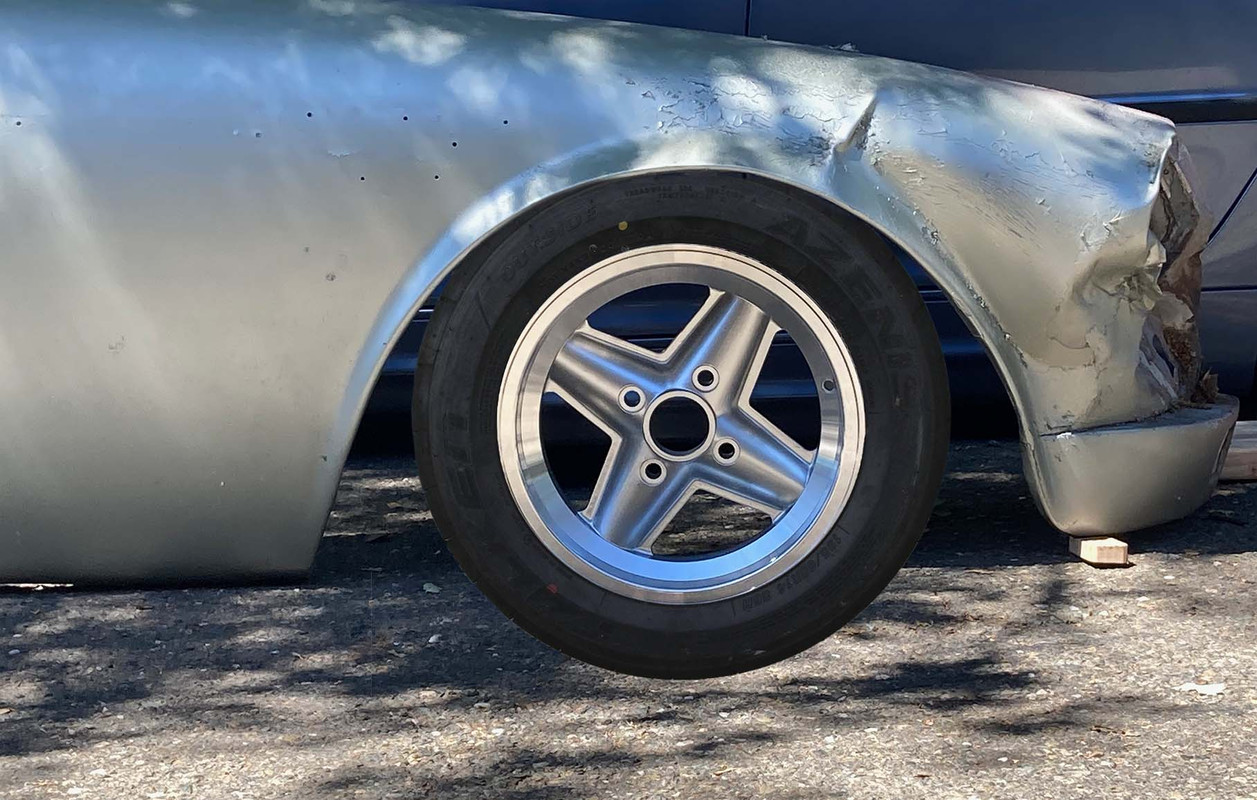
An added bonus to painting the fender is that I am now confident and very happy with my color choice.
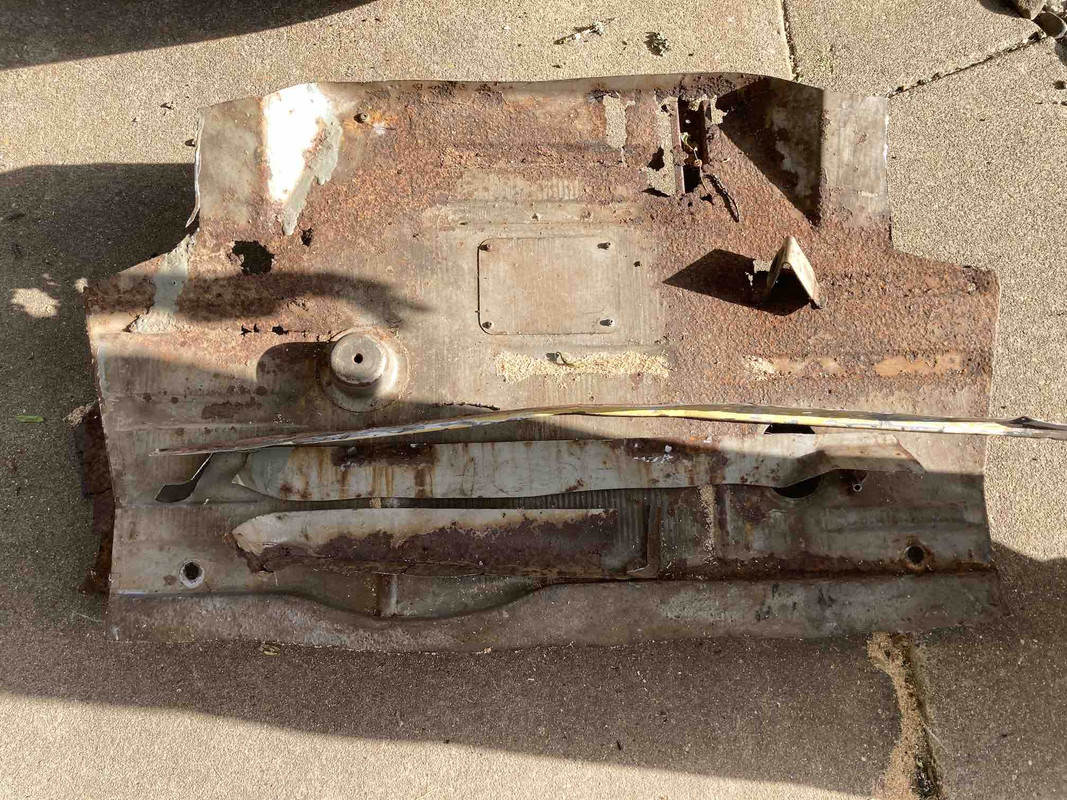
The rest of the day I spent sandblasting and powder coating. I redid my heater box, a few grill backs I brought with me, and the airflow thing behind the front bumper.
That was the trip.
And I must be a glutton for punishment because I'm itchin' to get back up there.