I've been trying to figure out a custom header for a while, but it's going to have to get done--hopefully in the next month. I'm one of these foolish guys that stay at a Holiday Inn so I can do that; watching youtube videos turns me into the gullible "of course I can do that" kind of person. I purchased one of the Iceengineworks header kit, thinking that it would greatly accelerate my production, and unfortunately it has not. In hindsight I would not purchase it, although it is useful for approximating shapes that I can cut. My initial efforts were trying to get equal length headers, and that necessitated going up like RCMike's, and that was going to be too long, and aesthetically, the feedback I got was that a simpler option would be preferred.
In my further research, equal length headers really don't do much for you if you can get to 24" length runners. In my mockups, I can do a simpler design that is right at 24" for each tube. So I've finished the first mockup tube and got the magic 24", but I've wasted a lot of stainless pipe--with metal, close is just no cigar (as seen in the lower picture with the large gap, a new piece fits nicely and is now tacked in place in the middle picture). SS especially requires a nice fit up on the metal.
I also am starting to hone my tig skills for this particular welding, and fortunately I have lots of scrap now to practice on. I will definitely be purging with Argon on the backside to get a great weld. Right now I'm having most success at running 80A on the 16ga steel at 50 pulses per second. I've also tried lower amps at 1.5pps, but that doesn't seem to get the full penetration I want until it gets the metal really hot at the end of a section; you can see the buildup more rounded on the exterior with the lower setting; the nice penetration you see on the opposite side in the interior is with the higher setting. I may also continue inching up on the amps at lower settings to get the penetration I want while maybe getting better "stack of dimes" on the look. With argon purging, the stainless does flow very nicely.
Hopefully figuring this out over Christmas will be my present! Stay tuned for updates.
SR20DE header build
Moderators: notoptoy, S Allen, Solex68
-
GoldHawg
- Roadsteraholic
- Posts: 591
- Joined: Sun Jul 30, 2006 3:27 pm
- Location: Spring Valley, OH
SR20DE header build
You do not have the required permissions to view the files attached to this post.
-
bobd
- Roadster Nut-Site Supporter
- Posts: 456
- Joined: Mon Sep 01, 2008 12:46 pm
- Location: Lakeland, FL
- Model: 2000
- Year: High Windshield-68-70
-
sfdaugherty

- Roadster Fanatic-Site Supporter
- Posts: 930
- Joined: Tue Jul 08, 2008 7:22 pm
- Location: Albuquerque, New Mexico
Re: SR20DE header build
Jeff:
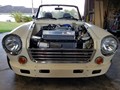
I'm looking forward to this. Even though this may not be as efficient as the factory header for the Autech (which won't fit in a roadster), I think it might add another 10-15 hp which is significant. My Autech dyno'd at 160 rwhp (factory rated at between 197-200 hp) with the cast front wheel drive manifold that, I think, everyone but Mike is using now. From what I've heard, Autech's that run the factory header dyno between 172 and 178 rwhp.
It may not be a turbo, but that kind of power is not bad!
Shannon
Last edited by sfdaugherty on Wed Dec 19, 2018 2:33 pm, edited 1 time in total.
69 2000 SRL311-10088 (Type 4 Solexes)
68 SR20DE SPL311-18735 (SR20DE S15 Autech)
68 2000 SRL311-01179 (Restoration underway)
68 1600 SPL311-20462 SOLD! After 41 years in the family
68 SR20DE SPL311-18735 (SR20DE S15 Autech)
68 2000 SRL311-01179 (Restoration underway)
68 1600 SPL311-20462 SOLD! After 41 years in the family
-
Alvin

- Roadster Nut-Site Supporter
- Posts: 8290
- Joined: Tue Jan 23, 2007 7:01 pm
Re: SR20DE header build
Cool!
RCMike's equal-length header on his SR20VE:
RCMike's equal-length header on his SR20VE:
Alvin Gogineni
San Jose, CA
1967.5 SPL/SR20
1997 Acura Integra GS-R
2022 Chevy Bolt EUV
zcarblog.com
Instagram
YouTube
My SR20 Build Thread
San Jose, CA
1967.5 SPL/SR20
1997 Acura Integra GS-R
2022 Chevy Bolt EUV
zcarblog.com
YouTube
My SR20 Build Thread
-
RCMike

- Roadsteraholic
- Posts: 2460
- Joined: Tue Mar 13, 2012 12:58 pm
- Location: Pomona, CA
Re: SR20DE header build
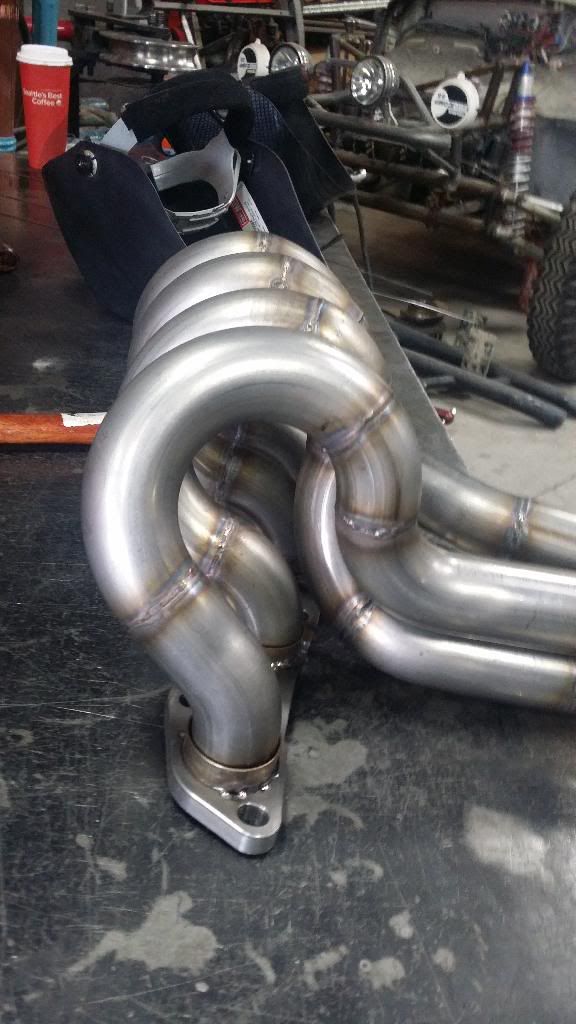
I thought those pictures were gone! Thank you Alvin!
My header getting heat cycled..lol
My header getting heat cycled..lol
-
GoldHawg
- Roadsteraholic
- Posts: 591
- Joined: Sun Jul 30, 2006 3:27 pm
- Location: Spring Valley, OH
Re: SR20DE header build
HEADER DESIGN/BUILD DETAILS
In case anybody else wants to try this, here are some of the things I've learned. When building SR20DE headers, one of the annoying issues is the slant of the engine combined with the oval port. When mocking up you can't really hold it in place without making the oval, and given the tight dimensions, you don't have room to create a stubby round section that you can make into an oval on the other end--you are really forced to get it pretty close in your mind and then you've got to make it. And as you can see from my angles, its really tough if you get it wrong. Yes you can rework, but you're never going to have that smooth look on the outside of the flange.
In any case I followed the build process from Stainlessheaders.com (excellent), and I ended up making a die to form the ends of the tube going into the flange. At first I tried to make an oval die and cut it in half, but then the middle ends squished out as you compressed (see pic). I then made another die (man I'm glad I have the CNC plasma for this effort) with the wide end of the oval wrapping a little around so the center couldn't squish out, and it was better, but still not perfect. Then an epiphany--stick some of the tube out of the other side of the die. When I did this it made the end of the tube pretty smooth. When I take the die off, I still have to squeeze it in the vise a bit more in the end that was sticking out, and then it fits nicely in the port; almost won't need any dolly work.
You do not have the required permissions to view the files attached to this post.
-
GoldHawg
- Roadsteraholic
- Posts: 591
- Joined: Sun Jul 30, 2006 3:27 pm
- Location: Spring Valley, OH
Re: SR20DE header build
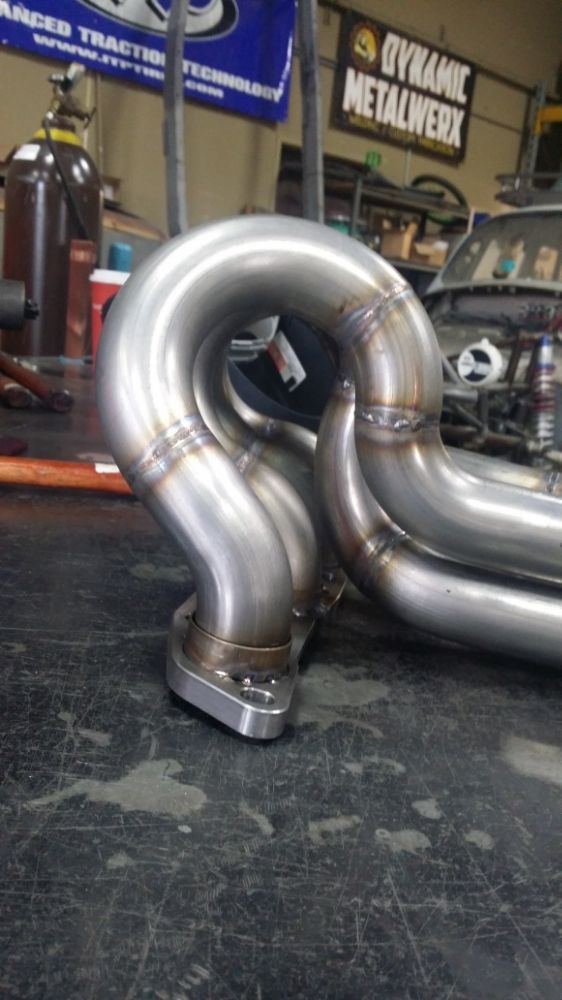
Today I got a new piece in which may change some of my ultimate design--I found a super tight radius USA SS 1.625 U-bend 16ga that is even tighter than my 2.0 CLR (compare the u-bend to the J-bend). This could make an even more compact install, although it will make it harder to get to 24" on the overall runner length. I'm pondering whether to change my plans for any of the remaining three tubes. Although I haven't laid those out, I have a nice path to get to 24" on the 3rd and 4th tube; I'm currently a little short on tube #2. I'm really happy with the first one, but even that I see a problem now with the bolt on the AC*. But this tight arc u-bend will probably have a roll in the near future even on the 2nd tube.
* If the AC compressor has to come out, the long 8mm bolt can't be removed until you swing out the compressor. And installing will have to have a short allen wrench to tighten it down once the aluminum bracket in place.
* If the AC compressor has to come out, the long 8mm bolt can't be removed until you swing out the compressor. And installing will have to have a short allen wrench to tighten it down once the aluminum bracket in place.
You do not have the required permissions to view the files attached to this post.
-
GoldHawg
- Roadsteraholic
- Posts: 591
- Joined: Sun Jul 30, 2006 3:27 pm
- Location: Spring Valley, OH
Re: SR20DE header build
One of the benefits of a custom header build is the ability to match the ports. And one of the benefits of a CNC process is once you get the dimensions in the CAD program, you've got for any future flange. I originally was just going to buy my flanges from Stainlessheaders.com. I sent them an exhaust manifold gasket and they sent it to a vendor who drew it up for them and now they sell the flanges. But the port size on their flange is a good bit smaller than the head exhaust ports. So I measured and drew up my own. I made sure there would be room on the inside of the flange to account for the 16 gauge tube. If anything I'm a bit over, but that's better than having a lip for the exhaust flow to have to travel over. I ended up sending this design to a local laser cutter who made me many flanges (yes I hope to be able to offer these to others through Miami Valley Roadsters).
You do not have the required permissions to view the files attached to this post.
-
GoldHawg
- Roadsteraholic
- Posts: 591
- Joined: Sun Jul 30, 2006 3:27 pm
- Location: Spring Valley, OH
Re: SR20DE header build
I continue practicing on my welding of the header tubes (although I may outsource this if I don't get happy), but one of the key things is the argon back purge, and avoiding warping the flange through excessive heat. So to solve both of these problems I took this massive aluminum block and machined it to feed argon through it, and I can bolt the flange to it. This will both draw out the heat and provide the argon back purge.
You do not have the required permissions to view the files attached to this post.
-
sfdaugherty
- Roadster Fanatic-Site Supporter
- Posts: 930
- Joined: Tue Jul 08, 2008 7:22 pm
- Location: Albuquerque, New Mexico
Re: SR20DE header build
Wow! I'm really impressed with your attention to detail and commitment to quality.
Shannon
Shannon
69 2000 SRL311-10088 (Type 4 Solexes)
68 SR20DE SPL311-18735 (SR20DE S15 Autech)
68 2000 SRL311-01179 (Restoration underway)
68 1600 SPL311-20462 SOLD! After 41 years in the family
68 SR20DE SPL311-18735 (SR20DE S15 Autech)
68 2000 SRL311-01179 (Restoration underway)
68 1600 SPL311-20462 SOLD! After 41 years in the family
-
GoldHawg
- Roadsteraholic
- Posts: 591
- Joined: Sun Jul 30, 2006 3:27 pm
- Location: Spring Valley, OH
Re: SR20DE header build
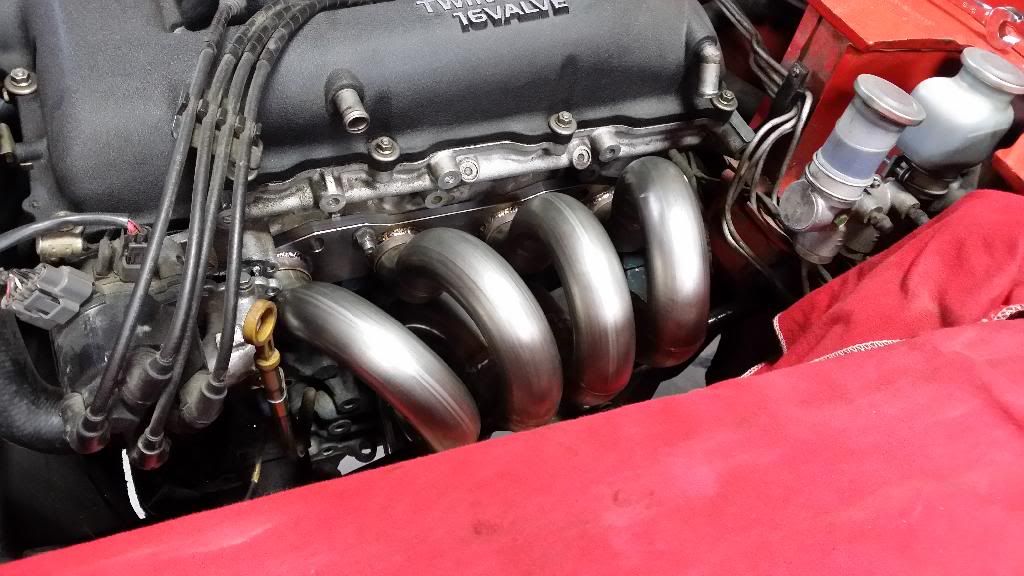
Making progress; header tube #3 in. This is helpful since I have two separate flange pieces--now I have a tube in each flange. I also am now able to support the merge collector with the two tubes. I also have looked closer at it, and I have about 3.5" of tube in the merge before the flow comes together. This will allow me to go a bit shorter on the tube length and I'll be cutting out 2" off each of the current tubes and this will allow the merge collector to come forward, and give add'l (much needed) clearance between the collector and the transmission and frame. It will also make it easier to connect to existing exhaust. I had to cut through a couple of the tacks to reposition a piece, and the tacks with argon backing were really in there good (that's why you see a larger spot on the tack in the current position on tube #3--I tacked where I had to grind the tube free). Once I'm done with this prototype, I'll be able to build a jig and hopefully be able to find even better paths to take the runners. But if I don't make any changes, this should flow really well.
I also pulled out the studs; they are really long (much longer than needed) and make it tougher to get the header on/off. I'll try going with cutting them off 5/16" or so and see if that leaves me clearance. If not, I'll use the ARP header bolts (in the correct 10mm X 1.25 pitch).
I also pulled out the studs; they are really long (much longer than needed) and make it tougher to get the header on/off. I'll try going with cutting them off 5/16" or so and see if that leaves me clearance. If not, I'll use the ARP header bolts (in the correct 10mm X 1.25 pitch).
You do not have the required permissions to view the files attached to this post.
-
GoldHawg
- Roadsteraholic
- Posts: 591
- Joined: Sun Jul 30, 2006 3:27 pm
- Location: Spring Valley, OH
Re: SR20DE header build
Tube #2 went in nicely. I'll add the 90 deg connection to complete when I finish tube #4 and take the header off. I'll finish both tubes on the bench where its easier to work with.
You do not have the required permissions to view the files attached to this post.
-
Datsun.David

- Site Supporter
- Posts: 1188
- Joined: Sat Sep 03, 2011 12:18 am
- Location: Calgary, Alberta, Canada
- Contact:
Re: SR20DE header build
Looking sharp! Great fab skills!
67.5 SRL311 #00050 - Silver - SU
67.5 SRL311 #00544 - Sora Blue SU
68 Roadster Race Car
69 SRL311
69 SRL311
72 PL510
74 260Z - Silver
67.5 SRL311 #00544 - Sora Blue SU
68 Roadster Race Car
69 SRL311
69 SRL311
72 PL510
74 260Z - Silver
-
Mattk
- Roadster Nut-Site Supporter
- Posts: 678
- Joined: Mon Oct 28, 2013 1:49 pm
- Location: DFW, TX
- Model: 2000
- Year: High Windshield-68-70
-
Bigtaku

- Roadster Fanatic
- Posts: 407
- Joined: Mon Dec 26, 2016 4:10 pm
- Location: Dayton, Nevada
- Model: 1500/1600
- Year: High Windshield-68-70