
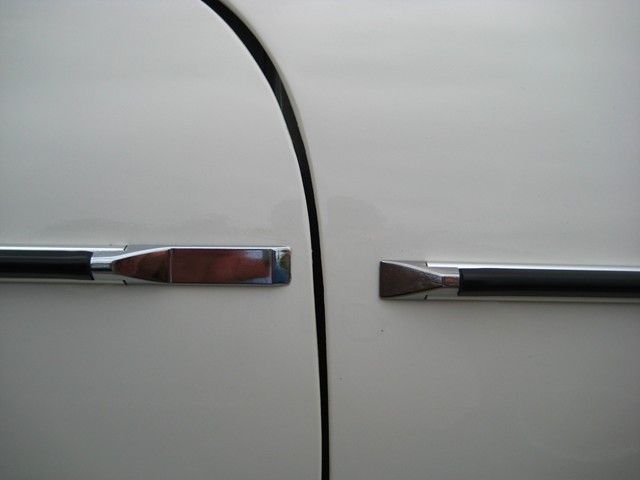
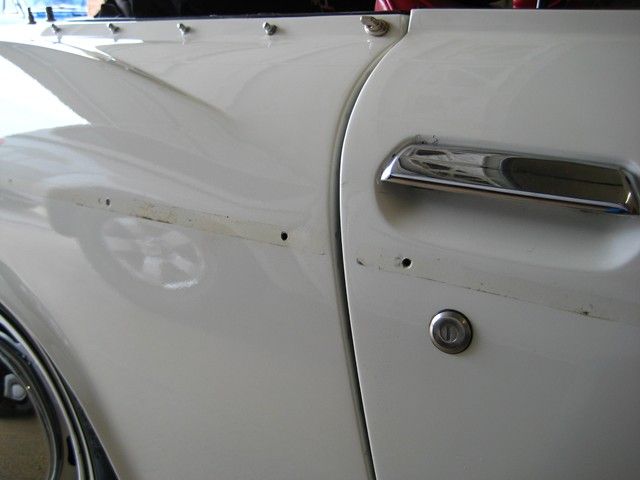
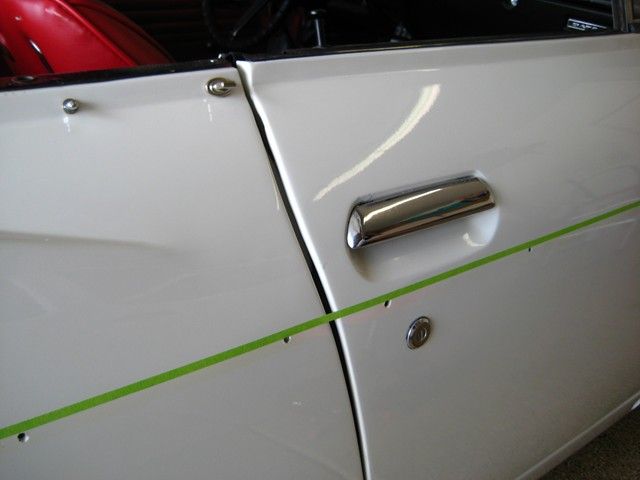
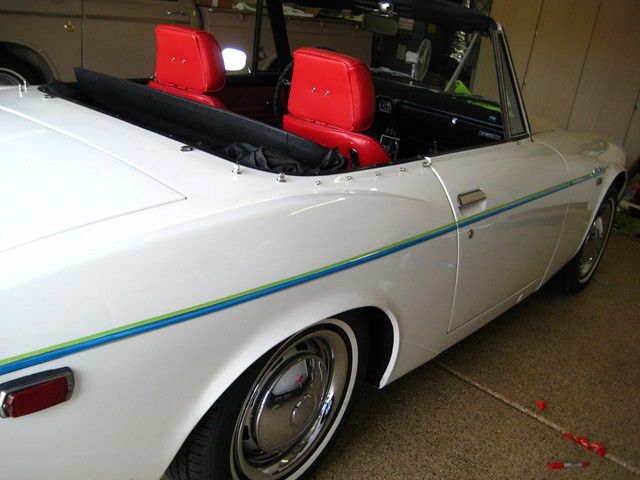
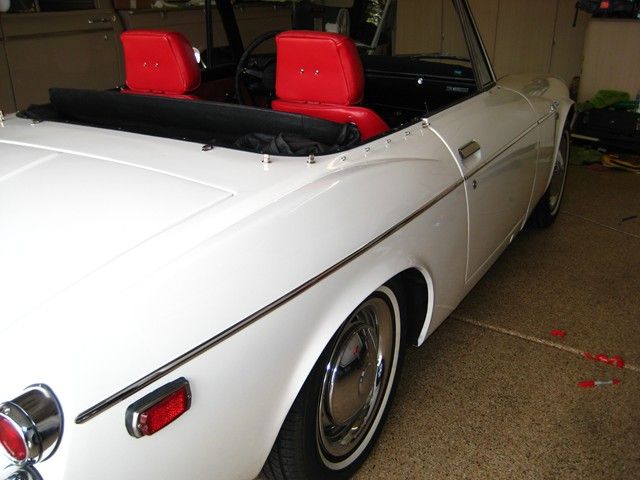
I’ve never liked the after-market type side trim that is on my roadster. It’s the type that is riveted on with a rubber or plastic insert. I think some call it “boat trim†I wanted the original style trim look. But trying to find the original trim in good shape is tough, and it’s pricey.
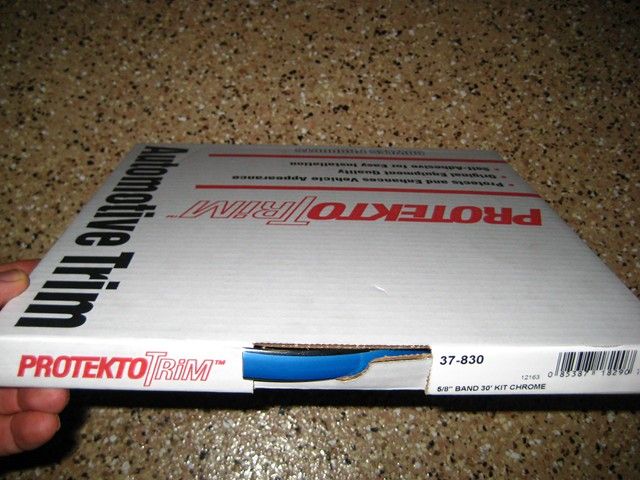
I decided to go with the stick-on style that a few others have used. It’s made by Protekto Trim. The kit part number is 37-830. It comes in a 30 foot length. It’s amazing how original it looks. It’s pretty easy to do and I’m happy with the results. This is also a good alternative for cars like mine that have had the seam on the rear fenders filled in prior to painting.
Here are the details of how I installed it. I’m sure there are many different ways of doing it, but this worked for me. I thought I would share my experience with it, in case someone else is considering going this route.
First step is to order the trim itself. I found it online at “Autopartsandstuff.com for about $25 shipped.
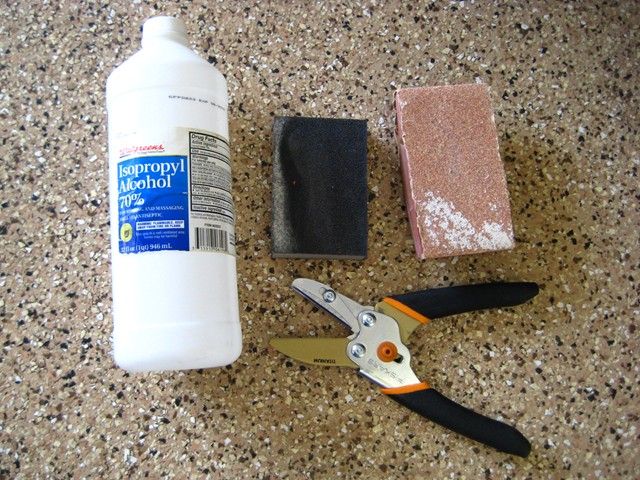
For tools, I used a rubber sanding block and a foam sanding block, a set of pruning shears for cutting the trim, Isopropyl Alcohol for cleaning the paint. Also I needed a drill and 1/8 bit to drill out the rivets on my car.
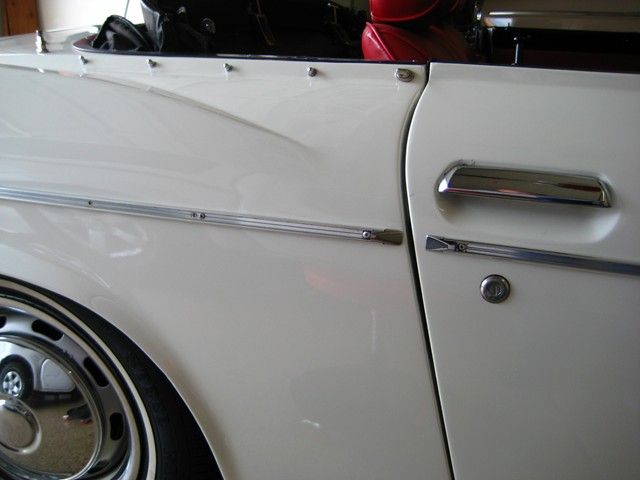
Here are a few pictures of the trim that I’m removing from my car. Not only do I not like the style, you can see it doesn’t even line up well between the front fender and door. It was a rather poor job of installing it. (sorry to whoever installed it)

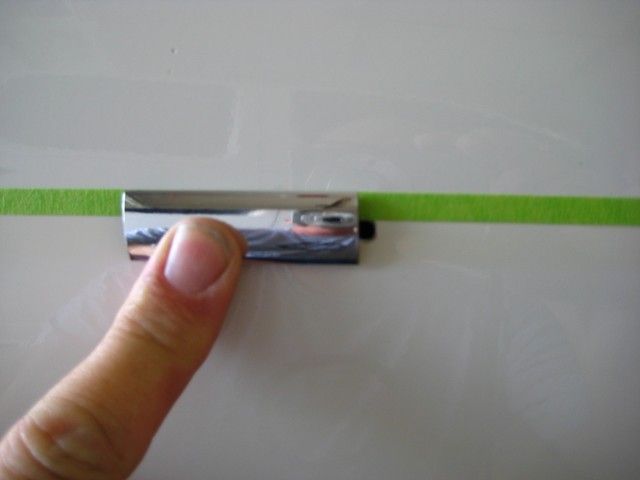
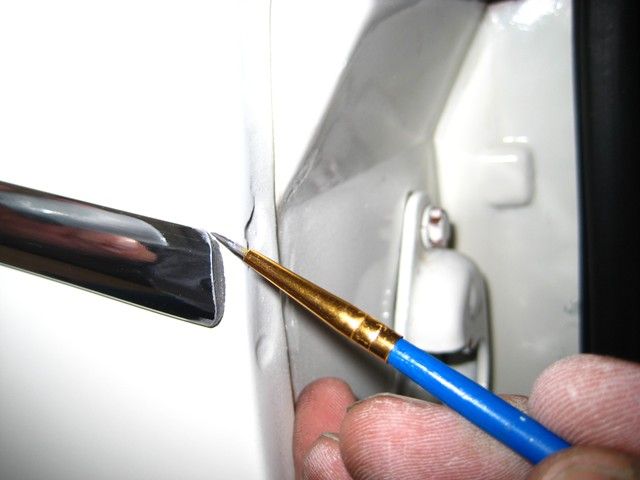
First thing is to remove the plastic insert from the old trim. I just used a pair of side cutters to grab it and then pull it out.
Once it’s out, I was left with just the old riveted on chrome pieces.
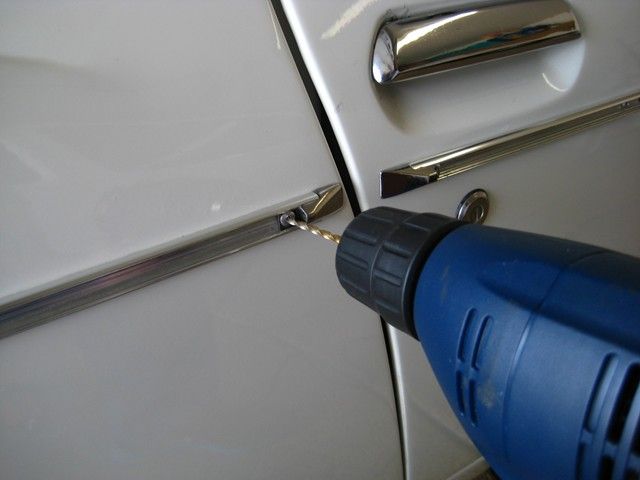
Next, I had to drill out all the rivets. Using a 1/8†drill bit, I carefully drilled them out one by one. Being super careful not to put any scratches in the car while removing this trim!
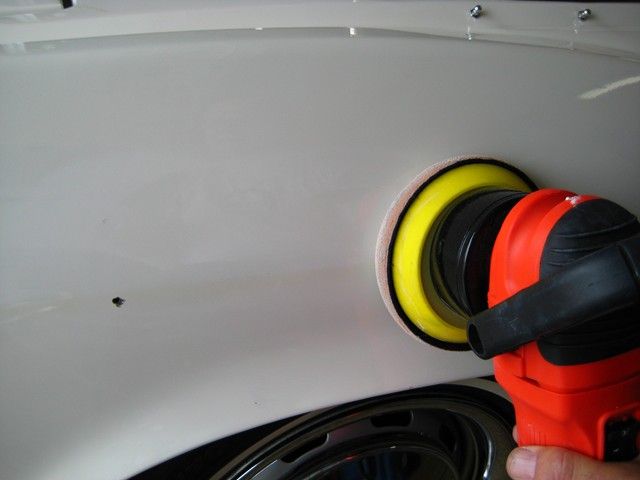
Now I was left with some marks on the paint and even some scratches where the old trim was.
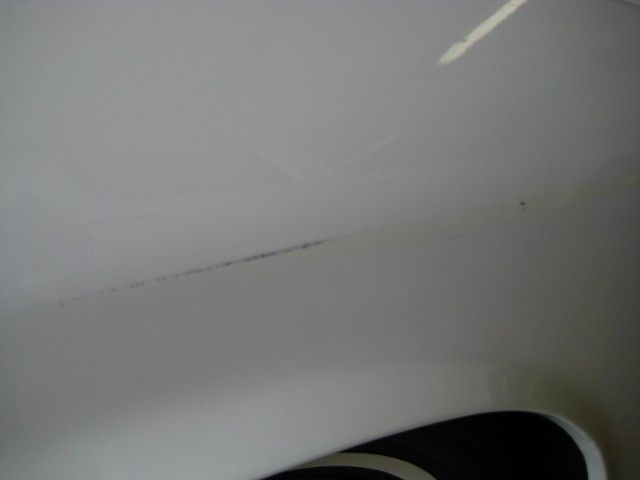
Not a big problem, I made a few passes with my buffer and some rubbing compound and got it looking pretty good prior to putting on the new trim.
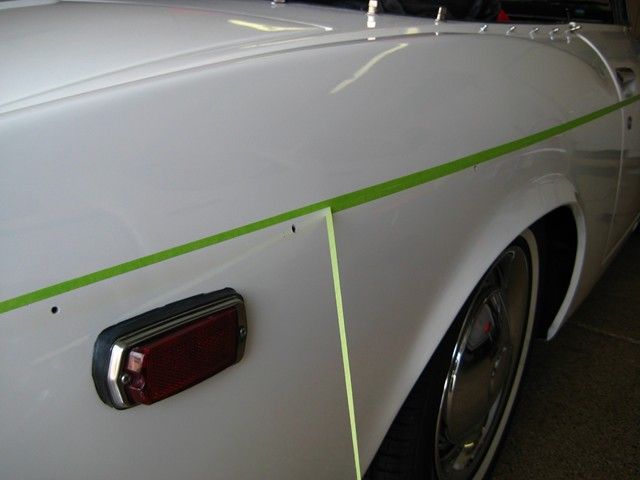
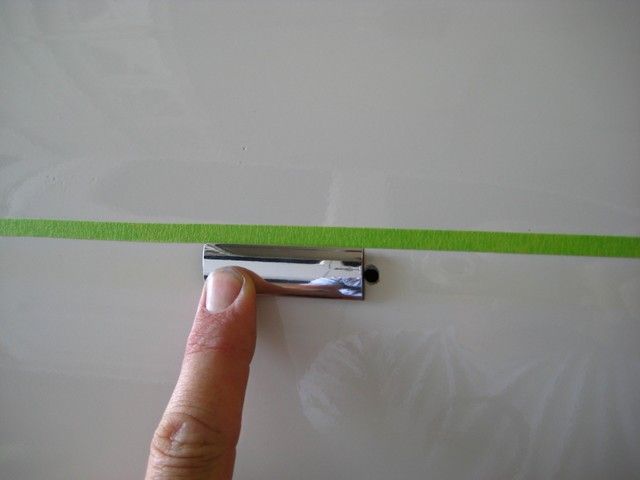
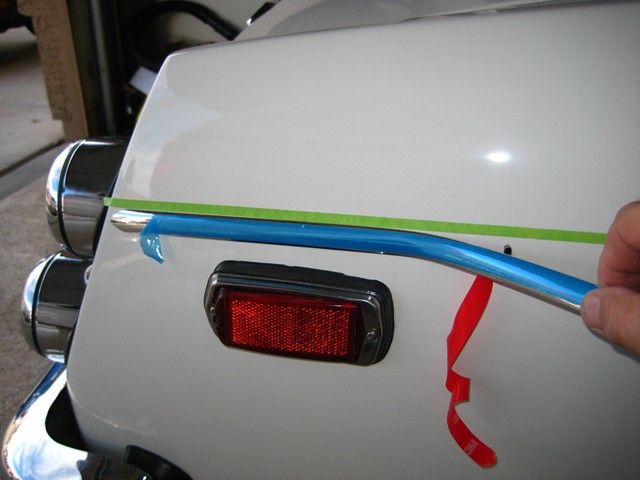
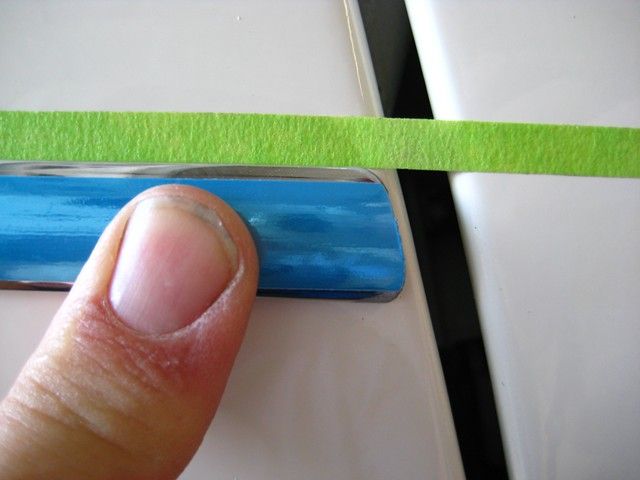
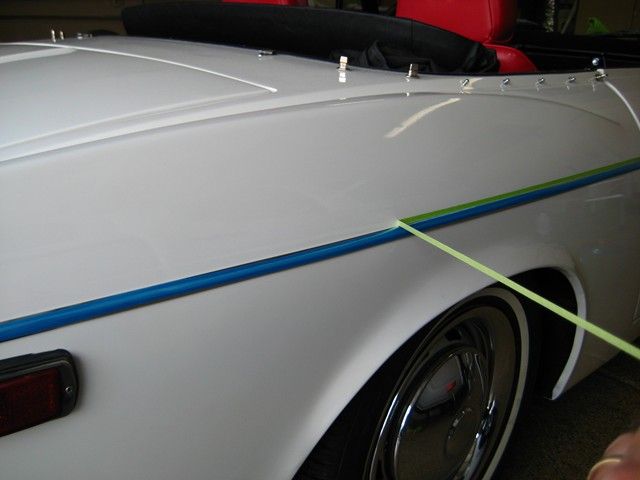
Now it was time to start laying out where I wanted the new trim to go. Of course I had to cover all the holes, but I also had some leeway to get it straighter than the old trim was. Using 1/4†masking tape, I made a straight line from front to back. It took me a few tries to get it just how I wanted it.
As you can see in the pictures below, I put the tape just above the existing holes for the most part. This allowed me to position the chrome trim to be centered over the holes.
Then I added one more tape line above my existing one. The bottom of this stripe will become my actual guideline.

Here I am removing the original tape line. I know this is a couple extra steps, but it allows me to put the 1st tape stripe about where it will actually go on the car, and then add the 2nd stripe for a guide to follow.
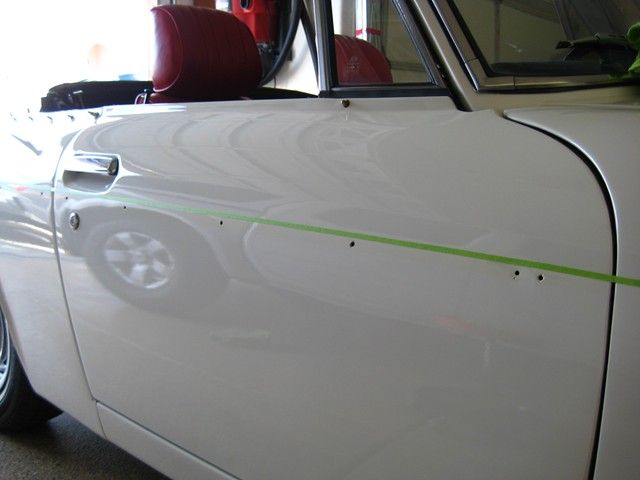
Ok, this is how it’s all laid out and you can see the position of how I’m going to use the tape as my guide. Now is a good time to wipe down the area with Isopropyl Alcohol to be sure the new trim sticks well.
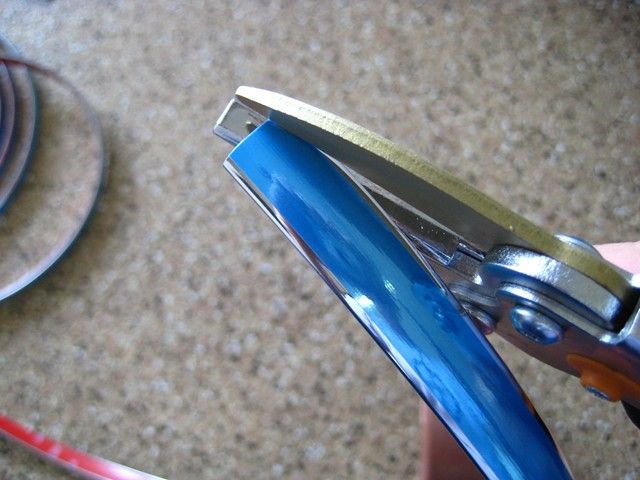
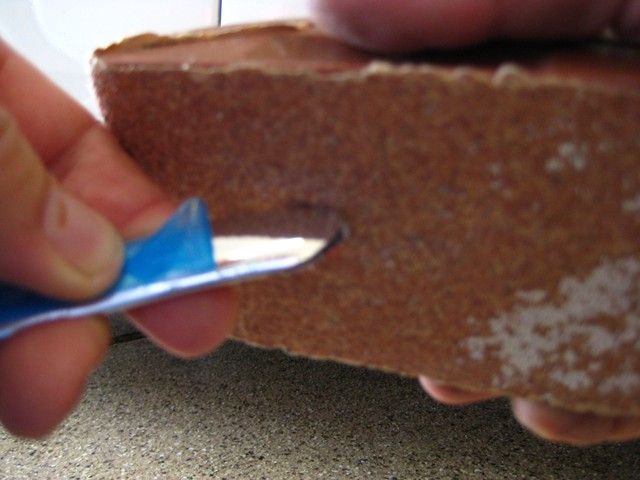
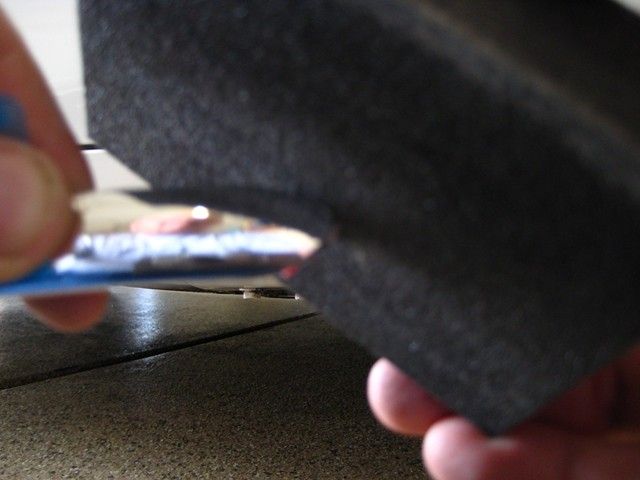
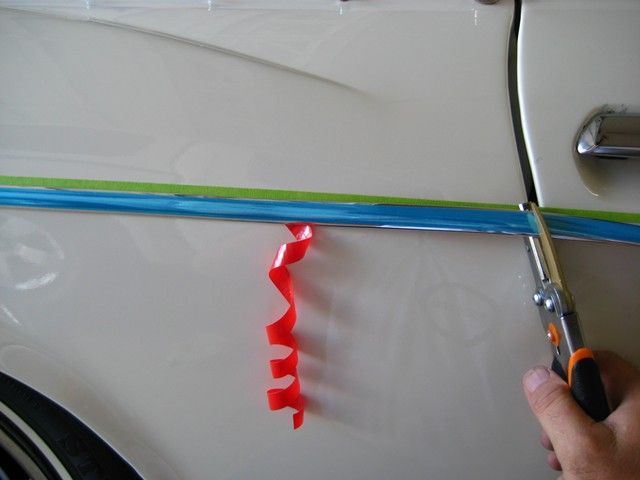
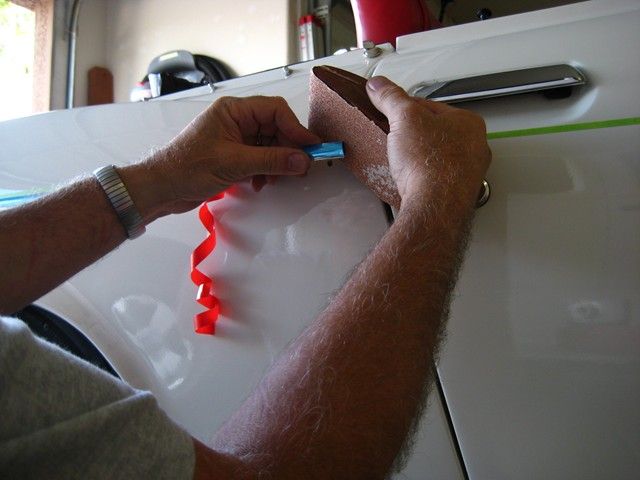
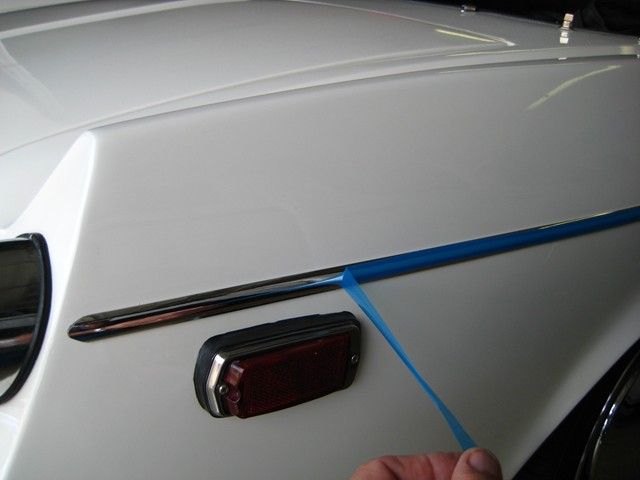
Next step was to start putting the trim on. It’s not really difficult. Start at the longest panel (rear in our case). Make the rear rounded radius by cutting with the pruning shears, then sanding it to the shape that you want.
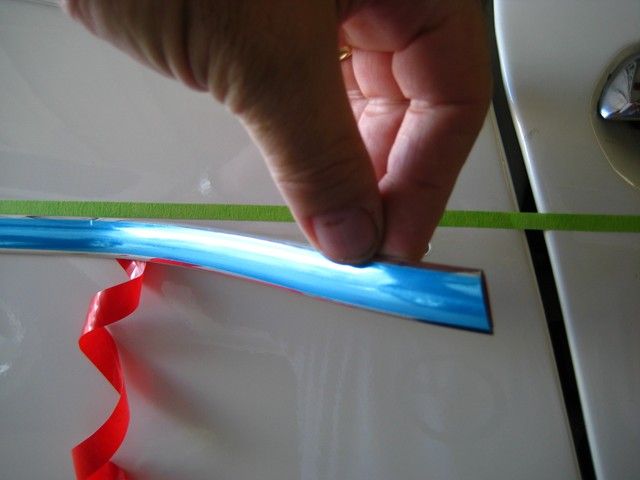
Start installing the trim right under your “guideline†tape stripe. Leave the blue protective coating on the chrome trim for now. Also, only remove the adhesive backing as you go along. I pulled back about 6-8 inches at a time. It’s much easier to handle this way.
When you get to the front of the rear fender, leave the adhesive backing on the last 6 inches or so and don’t stick it down yet. This will allow you to cut and sand the end slightly to round the corners. While holding the trim to the edge of the fender and door, cut it at the same angle as the door edge with the pruning shears. Then you can sand it slightly. Once you have it sanded to the profile that you want, remove the remaining adhesive backing and stick it down
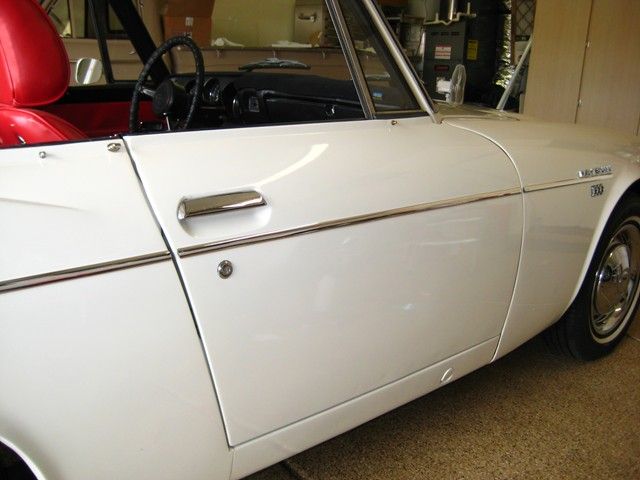
Now continue on to the door. Do it in the same way as the fender.
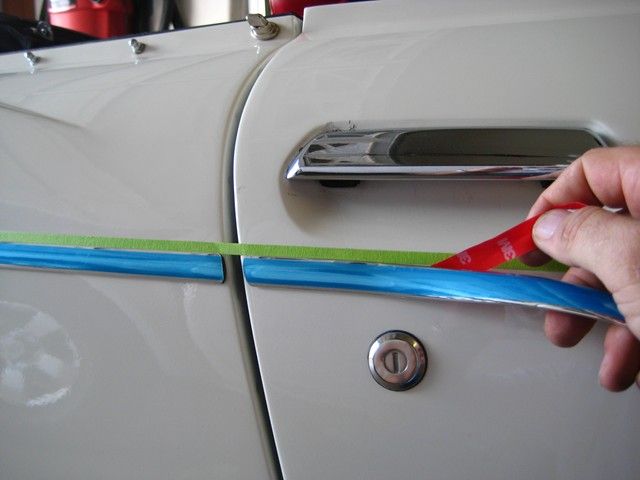
When you get to the front of the door, again leave some adhesive backing on the last 6 inches so you have an end to work with. Now, this cut is the most critical on the whole car. If you get it to close to the front edge of the door, it will hit the fender when you open the door. So after you have it cut and trimmed, be sure to just hold it in place and open the door to see if it will hit. If it does, cut or sand it a little more. Once you are comfortable with the fit, remove the adhesive backing and stick it down.

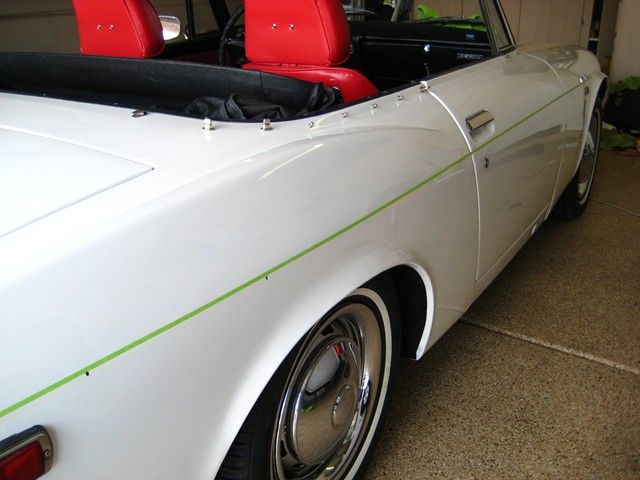
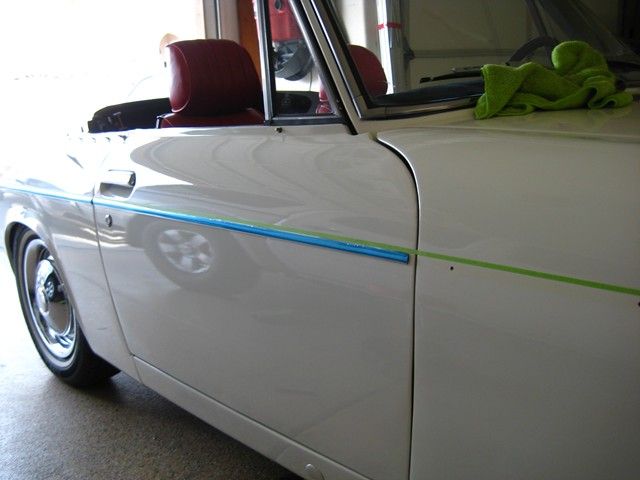
Now you’re almost done with the first side! The rear fender and door is done!
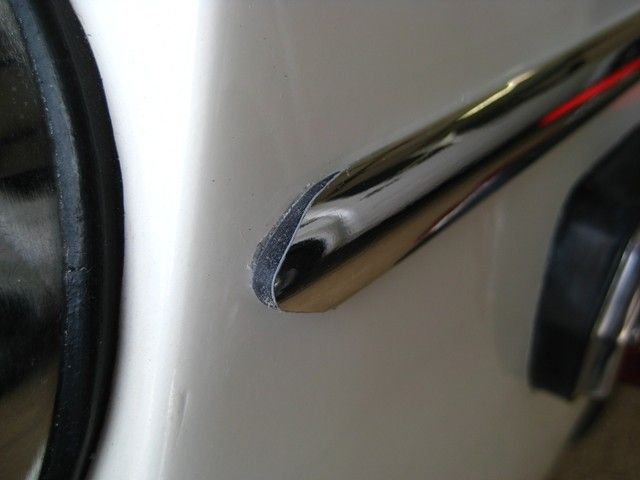
For the front fender, I worked backwards. I find that rounding the ends of the trim is one of the harder parts to get right. So start by rounding the forward end. (by doing it this way, if you mess up the radius of this end you only have to cut it back an inch and start again). Once you get the forward tip how you want it, start putting it on at the front and work back towards the doors. All most done!
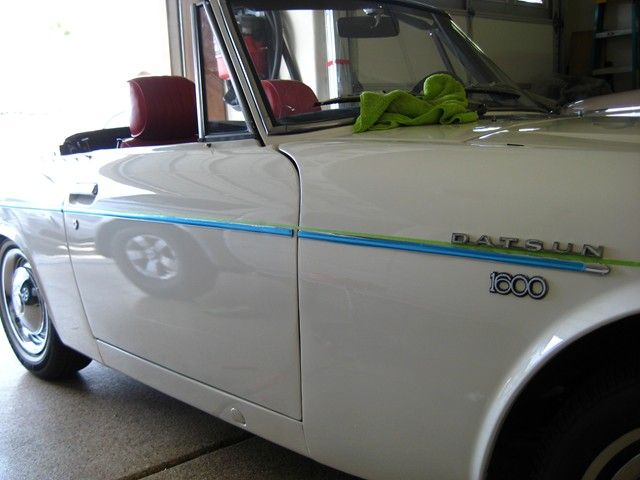
Make sure it all looks straight and how you want it. If it looks good, take a rag and move along the trim, pressing firmly from one end to the other to make sure it’s stuck down real well. Then remove the “guide†tape.
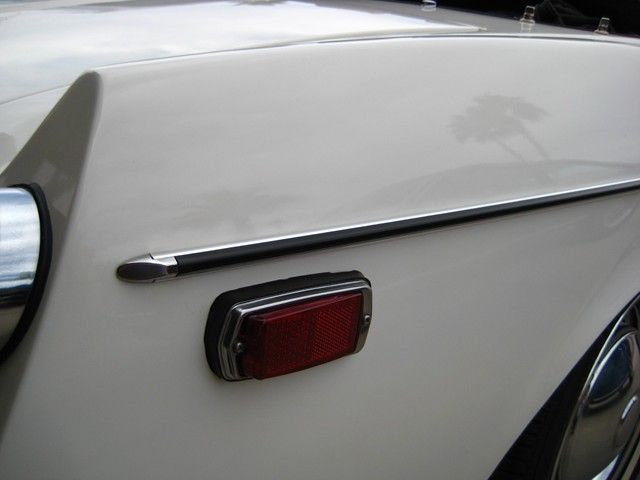
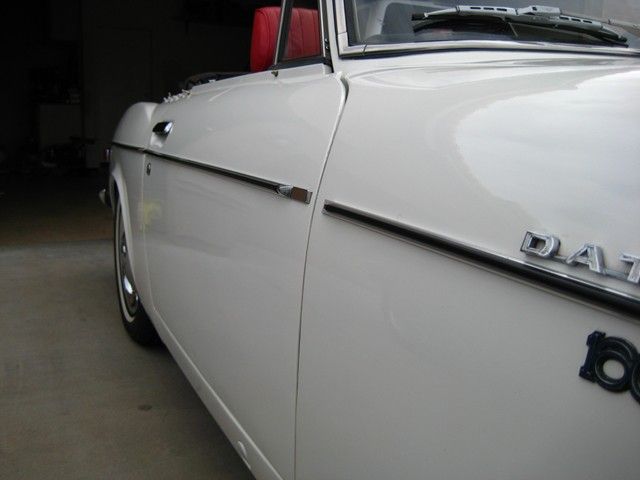
Last, remove the blue protective film and admire your work!
Bones points… If you’re somewhat anal to details (yes, me), you can paint the edges where you cut it. Since this is plastic trim, when you cut it and sand the edges you reveal some black. I used a can of “Chrome†spray paint. Sprayed it into a little cup and then dip a small brush into it. Just to touch up the edges a bit. It’s not really that noticeable but you can if you want.
Before painting.
After painting edge

After doing both sides of the car, I still had enough chrome trim to do another complete side. So there is plenty in this kit. If you mess a piece up, just do it over. There is enough.
I hope this helps someone else who was wondering about doing this type trim. I think it’s a great option to the original trim. I don’t have the original trim, and my rear fenders don’t have the seam anymore. Also, my car is not a 100pt show car, so this works for me. I think it’s much better than what I had on there.
Dale - Arizona