Well resumed work on trying to get the tranny crossmember completed. I had some interference with the transmission in the new crossmember piece, so I cut that out and welded a new piece in giving me about 1/4"-3/8" clearance. I am closer on the the b/u lamp switch (about 1/8" clearance) but don't think it will be a problem. I had to cut a piece of the transmission that was interfering but I still have some interference, however it looks like I can take my sawzall and take some more off (its just a rib going down vertically and shouldn't have any problem being removed). I'm trying to get 6 deg down, to match the 6 degree up the Datsun rear end angle has. That's more than I'm used to, but they do have to be parallel and so if the rear is that angle, I need to go down more on the tranny tail housing. My helper pointed out that the angle we have is obviously going to be determined by the frame--and I currently have the frame on the lift. However on the tranny crossmember sections we are right parallel to the ground.
Any reason I shouldn't take a sawsall to remove more of the horizontal rib and boss so I can get the tranny down?
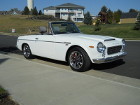
40 years in the making...
Moderators: notoptoy, S Allen, Solex68
-
GoldHawg
- Roadsteraholic
- Posts: 591
- Joined: Sun Jul 30, 2006 3:27 pm
- Location: Spring Valley, OH
Re: 40 years in the making...
You do not have the required permissions to view the files attached to this post.
-
spriso

- Vendor
- Posts: 1572
- Joined: Wed Jun 04, 2003 9:20 am
- Location: Oregon
- Contact:
Re: 40 years in the making...
Jeff,
We often will trim or modify some of the casting bungs on the 6-speed transmission to get it to package a little better (especially on the 510s!). I would not be afraid of doing the same thing on the 6-speed for your roadster frame.
Michael
We often will trim or modify some of the casting bungs on the 6-speed transmission to get it to package a little better (especially on the 510s!). I would not be afraid of doing the same thing on the 6-speed for your roadster frame.
Michael
Spriso Motorsports
http://www.spriso.com
Instagram https://instagram.com/spriso/
SR20 Powered Roadsters
Engine swap kits Available! See my website!
http://www.spriso.com
Instagram https://instagram.com/spriso/
SR20 Powered Roadsters
Engine swap kits Available! See my website!
-
JT68
- Talented Enthusiast
- Posts: 2922
- Joined: Sun Jan 27, 2013 9:43 am
- Location: Cumming, GA
Re: 40 years in the making...
Just curious, are you loading the rear suspension as it will be when assembled? Since the rear swings through an arc, the pinion angle varies, so its always an approximation, but you are right, if it gets too wonky you'll have a problematic driveline vibration.
You probably already have it parallel left-to-right I imagine.
If you build the trans mount at the lowest point it could need, you can always raise the trans tail just by using a mount spacer. 1/4" ,1/2" or even 3/4" thick spacer would not be problematic and would allow a wide range of adjustment. Just a thought- rock on! Jt
LT/JT
https://www.datsunrestorationproducts.com/
Only the very BEST parts for your Datsun- 10000's of items in stock
New, Used and Reproduction!
https://www.datsunrestorationproducts.com/
Only the very BEST parts for your Datsun- 10000's of items in stock
New, Used and Reproduction!
-
GoldHawg
- Roadsteraholic
- Posts: 591
- Joined: Sun Jul 30, 2006 3:27 pm
- Location: Spring Valley, OH
Re: 40 years in the making...
Well, I'm finally done with the welding on the bottom side. The new jacking point/oil pan guard took forever--the stock crossmember was super wavy so I had big gaps, even when I put some thinner pieces of metal in between to fill the gap. And then for some reason my mig isn't working right, so I had to tig the entire thing, and I don't have a water cooled torch--so the torch was smoking hot. But its done. My buddy started working on the bracket for the AC compressor while I was welding on the jacking point. I have quite a few shots from Shannon's install so I'm using that as the starting point. I want that done first, and then I'm going to take a crack at making my own custom SS header.
You do not have the required permissions to view the files attached to this post.
-
GoldHawg
- Roadsteraholic
- Posts: 591
- Joined: Sun Jul 30, 2006 3:27 pm
- Location: Spring Valley, OH
Re: 40 years in the making...
Trying to get back to the Roadster now that its summer time. Still waiting on my header components to be ready from stainlessheaders.com (they didn't have an SR20DE flange already--I had to mail them the gasket from the car and they're making one but will now have for other buyers). In the mean time I've started on the bracket for the A/C. I bought the smallest compressor I could find (the Sanden SD-7B10), and have it tucked high and tight as possible, but I'm still worried about the steering column (which unfortunately is still attached to the body). Wonder if this thing will clear?
I'm going to wait to build the top bracket after I get the header done as I may need to leverage one of the header flange bolts.
I'm going to wait to build the top bracket after I get the header done as I may need to leverage one of the header flange bolts.
You do not have the required permissions to view the files attached to this post.
-
sfdaugherty

- Roadster Fanatic-Site Supporter
- Posts: 931
- Joined: Tue Jul 08, 2008 7:22 pm
- Location: Albuquerque, New Mexico
Re: 40 years in the making...
Jeff:
It looks identical to my AC install (amazing how that happens )and mine clears the column with less than 1/2" to spare.
Shannon
It looks identical to my AC install (amazing how that happens
Shannon
69 2000 SRL311-10088 (Type 4 Solexes)
68 SR20DE SPL311-18735 (SR20DE S15 Autech)
68 2000 SRL311-01179 (Restoration underway)
68 1600 SPL311-20462 SOLD! After 41 years in the family
68 SR20DE SPL311-18735 (SR20DE S15 Autech)
68 2000 SRL311-01179 (Restoration underway)
68 1600 SPL311-20462 SOLD! After 41 years in the family
-
dynaguy
- Roadster Fanatic-Site Supporter
- Posts: 1218
- Joined: Wed Jan 01, 2003 3:27 pm
- Location: Colton, Wa
Re: 40 years in the making...
I'm interested in the A/C install process. Keeping the passenger seat occupant comfy is important for future road trips. Any write-ups on this?
Pat
Pat
-
sfdaugherty
- Roadster Fanatic-Site Supporter
- Posts: 931
- Joined: Tue Jul 08, 2008 7:22 pm
- Location: Albuquerque, New Mexico
Re: 40 years in the making...
My AC install is not well documented because the parts are all custom-made to fit the compressor close to the engine and clear the steering column. The last time I had my engine out, I sent photos of the parts next to a ruler so that Goldhawg could make copies. His front mount looks identical to mine but he is going to use a different rear mount due to his custom header.
I use a Tuff Stuff peanut AC compressor which is equivalent to the Sanden SD7. My belt tensioner is a GM part.
I also used a Vintage Air Gen IV Magnum evaporator which is a tight fit under the dash (takes some of the passenger foot space). There was a guy at Solvang (low windshield red car with matching hardtop) this year who is using a Vintage Air Compac Unit (Gen II unit I think). I wanted the Gen IV because the vent controls are servo operated so I can operate them electronically using my stereo head unit or my iPhone (no mechanical levers). Quote from the Vintage Air site Gen IV systems utilize our exclusive fully electronic microprocessor control servomotor drives to eliminate cables or vacuum connections. Bottom line is that the Gen IV is a larger evaporator but eliminates the concern of routing cables.
My biggest challenge has been having to recharge my system multiple times because I'm on my 3rd engine. I just put in my S15 Autech and I now have a leak and won't hold vacuum. Trying to figure that out now.
Shannon
69 2000 SRL311-10088 (Type 4 Solexes)
68 SR20DE SPL311-18735 (SR20DE S15 Autech)
68 2000 SRL311-01179 (Restoration underway)
68 1600 SPL311-20462 SOLD! After 41 years in the family
68 SR20DE SPL311-18735 (SR20DE S15 Autech)
68 2000 SRL311-01179 (Restoration underway)
68 1600 SPL311-20462 SOLD! After 41 years in the family
-
GoldHawg
- Roadsteraholic
- Posts: 591
- Joined: Sun Jul 30, 2006 3:27 pm
- Location: Spring Valley, OH
Re: 40 years in the making...
Pat,dynaguy wrote:I'm interested in the A/C install process. Keeping the passenger seat occupant comfy is important for future road trips. Any write-ups on this?
Pat
I'll be sure to document my progress on here, but the total rebuild time on my ride will be at least another year, so you won't get it soon.
-
dynaguy
- Roadster Fanatic-Site Supporter
- Posts: 1218
- Joined: Wed Jan 01, 2003 3:27 pm
- Location: Colton, Wa
Re: 40 years in the making...
It would be nice if you would trace the custom brackets that have worked for you so others could have a pattern, strong hint implied.  Pat
Pat
-
GoldHawg
- Roadsteraholic
- Posts: 591
- Joined: Sun Jul 30, 2006 3:27 pm
- Location: Spring Valley, OH
Re: 40 years in the making...
Still waiting on Stainless Headers to get back with me to enable work on the custom header. So, jumping ahead to the flat dash conversion so I can put the rusty 66 back on c/l for a rat rod for someone else and out of my shop. Dash is out on the 69, and I'll begin working the swap on Monday.
You do not have the required permissions to view the files attached to this post.
-
GoldHawg
- Roadsteraholic
- Posts: 591
- Joined: Sun Jul 30, 2006 3:27 pm
- Location: Spring Valley, OH
Re: 40 years in the making...
I'm wrapping up the flat dash install now, and parts are almost all in to begin my custom header. On the AC install, I'm trying to use the mockup from VintageAir for the evaporator, and I ordered the Gen II mini, which is the smallest unit. It does extend about 2" beyond the available space to have it against the firewall. I know Shannon went with the bigger Gen IV, which actually fits better, but it does come at some expense of passenger foot room. So I'd like to make the Gen 2 work. I see two options--either cut metal and make a space behind the fender, or move the pocket over 2" toward the center (where the heater hose comes in). The first option would be best if there is room, but there is a brace that extends thru there and I don't really want to cut and reconfigure that. So if I move the pocket over, I know I'll have to adjust the throttle bracket, and the heater hole is irrelevant since I'll have new heater/ac lines coming in elsewhere anyway, but are there other issues that I should be concerned about?
You do not have the required permissions to view the files attached to this post.
-
GoldHawg
- Roadsteraholic
- Posts: 591
- Joined: Sun Jul 30, 2006 3:27 pm
- Location: Spring Valley, OH
Re: 40 years in the making...
I'm loving the fact that I started with a virtually rust free roadster (if there is such a thing). The floorpans are nice and solid, with just a bit of surface rust where the seats were. But did I really do this? Yes I did, no turning back now! Must have room for the 6 speed.
You do not have the required permissions to view the files attached to this post.
-
GoldHawg
- Roadsteraholic
- Posts: 591
- Joined: Sun Jul 30, 2006 3:27 pm
- Location: Spring Valley, OH
Re: 40 years in the making...
I will be trying to get more details out in the future, but the Fab work is almost best just done by looking at pictures. So here is how I am doing it. I may try to put in Solidworks and see if a kit could be made. But if you like a bandsaw, a drill press, a belt sander and a welder, this is not too bad. But I'd say I'm a good 10+ hours into it, and that's with looking at pictures from others to give me ideas. 3 rib belt Gates K030334, and belt tensioner is Gates 38159.dynaguy wrote:It would be nice if you would trace the custom brackets that have worked for you so others could have a pattern, strong hint implied.
You do not have the required permissions to view the files attached to this post.
-
GoldHawg
- Roadsteraholic
- Posts: 591
- Joined: Sun Jul 30, 2006 3:27 pm
- Location: Spring Valley, OH
Re: 40 years in the making...
My new year's resolution is to update this thread. But in the meantime, I've finished the design for my valve cover coil pack cover plate for my Autech engine.
You do not have the required permissions to view the files attached to this post.