Tom aka notoptoy was kind enough to send me a write-up with pictures he did for engine removal. I will get it added to the wiki eventually but thought I would post it here right away. Thanks Tom for sharing.
Steve
Steps by step engine removal guide
Moderators: notoptoy, S Allen, Solex68
-
S Allen
- Site Admin
- Posts: 4543
- Joined: Thu Dec 05, 2002 4:57 pm
- Location: Knoxville, IA(Lake Redrock)Emory, TX
- Model: 1500/1600
- Year: Low Windshield-64-67.5
- Contact:
Steps by step engine removal guide
You do not have the required permissions to view the files attached to this post.
66 Stroker-Going Orange
67 SRL311-00279-resto project
Stock '72 240Z-Blue
2002 Ford F250 7.3 Diesel 2WD Hauler
2008 Toyota FJ Cruiser
2009 Smart ForTwo Passion Coupe
2013 Fiat 500 Abarth
67 SRL311-00279-resto project
Stock '72 240Z-Blue
2002 Ford F250 7.3 Diesel 2WD Hauler
2008 Toyota FJ Cruiser
2009 Smart ForTwo Passion Coupe
2013 Fiat 500 Abarth
-
SlowBoy

- Roadster Fanatic
- Posts: 309
- Joined: Tue Jul 27, 2004 11:56 am
- Location: Peoria, Arizona (Just West of Hell)
-
notoptoy
- Vendor-Site Supporter
- Posts: 9677
- Joined: Fri Oct 02, 2009 2:55 pm
- Location: Winston-Salem, NC and Ocala, FL
- Contact:
Re: Steps by step engine removal guide
Thanks, glad they can come in handy!
"When all else fails, force prevails!" Ummm, we're gonna need a bigger hammer here.
67.5 SPL311 H20 w/5 speed
65 Impala Convertible
2017 C43 AMG
67.5 SPL311 H20 w/5 speed
65 Impala Convertible
2017 C43 AMG
-
dbrick

- Roadster Fanatic-Site Supporter
- Posts: 10084
- Joined: Thu Sep 09, 2004 11:05 pm
- Location: Kenilworth, New Jersey
Re: Steps by step engine removal guide
Thanks for taking the time to document this so thoroughly. Great reference. Adding the wrench sizes is a real help, saves trial and error if it's your first time,
Dave Brisco
Take my advice, I'm not using it"
66 2000 The Bobster
64 1500 in pieces for sale
1980 Fiat X1/9
2009 Volvo C-70
08 Expedition EL, STUPID huge but comfy
1962 Thompson Sea Lancer, possible money pit
-
notoptoy
- Vendor-Site Supporter
- Posts: 9677
- Joined: Fri Oct 02, 2009 2:55 pm
- Location: Winston-Salem, NC and Ocala, FL
- Contact:
Re: Steps by step engine removal guide
That's assuming that mine is "standard" which I doubt often! In gettng ready to put mine back together, I've seen lots of things that aren't standard. Still it's a good start!dbrick wrote: Adding the wrench sizes is a real help, saves trial and error if it's your first time,
"When all else fails, force prevails!" Ummm, we're gonna need a bigger hammer here.
67.5 SPL311 H20 w/5 speed
65 Impala Convertible
2017 C43 AMG
67.5 SPL311 H20 w/5 speed
65 Impala Convertible
2017 C43 AMG
-
ppeters914

- Roadster Fanatic-Site Supporter
- Posts: 3075
- Joined: Mon Jun 28, 2004 5:51 pm
- Location: Lake Forest Park, WA (just north of Seattle)
- Model: 1500/1600
- Year: Low Windshield-64-67.5
Re: Steps by step engine removal guide
I expect to be doing this "soon" so I'll QA the doc.
Pete
-------------------------------------
'67 1600 - frame off started in 2014. Now I know why roadster projects take so long. What a stupid idea.
'66 1600 - parts car
'66 WPL411 ***SOLD***
A couple of Porsches, a RAV4 Hybrid, and a motorcycle
-------------------------------------
'67 1600 - frame off started in 2014. Now I know why roadster projects take so long. What a stupid idea.
'66 1600 - parts car
'66 WPL411 ***SOLD***
A couple of Porsches, a RAV4 Hybrid, and a motorcycle
-
notoptoy
- Vendor-Site Supporter
- Posts: 9677
- Joined: Fri Oct 02, 2009 2:55 pm
- Location: Winston-Salem, NC and Ocala, FL
- Contact:
Re: Steps by step engine removal guide
Let me know if you want the raw word file to edit. With the pictures, it's a monster, that's why it I made it a PDF.
"When all else fails, force prevails!" Ummm, we're gonna need a bigger hammer here.
67.5 SPL311 H20 w/5 speed
65 Impala Convertible
2017 C43 AMG
67.5 SPL311 H20 w/5 speed
65 Impala Convertible
2017 C43 AMG
-
Karr
- Roadster Nut
- Posts: 31
- Joined: Thu Sep 26, 2019 4:17 pm
- Location: California
- Model: 1500/1600
- Year: Low Windshield-64-67.5
Re: Steps by step engine removal guide
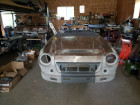
I know this is an old thread, but I just had to say thanks. I’ve never removed the engine before and this made it so much easier. Took me 4-5 hours doing it by myself but I was also labeling every single wire. Toughest part was my exhaust manifold was welded to the rest of the exhaust. Nothing a sawzall couldn’t handle.
Great Guide!
Great Guide!
You do not have the required permissions to view the files attached to this post.
“Life is too short and unpredictable to play it safeâ€
-
notoptoy
- Vendor-Site Supporter
- Posts: 9677
- Joined: Fri Oct 02, 2009 2:55 pm
- Location: Winston-Salem, NC and Ocala, FL
- Contact:
Re: Steps by step engine removal guide
Very cool, glad you could put the guide to use! I should probably update that with the corrected bits I have since added, plus I have a 5 speed instead of a 4 speed so the driveshaft removal is a bit different. Congrats on getting it out and to the next step in your project!
"When all else fails, force prevails!" Ummm, we're gonna need a bigger hammer here.
67.5 SPL311 H20 w/5 speed
65 Impala Convertible
2017 C43 AMG
67.5 SPL311 H20 w/5 speed
65 Impala Convertible
2017 C43 AMG
-
Karr
- Roadster Nut
- Posts: 31
- Joined: Thu Sep 26, 2019 4:17 pm
- Location: California
- Model: 1500/1600
- Year: Low Windshield-64-67.5
Re: Steps by step engine removal guide
It was great. Only difference for me was most of the 13mm nuts and bolts fit better in 1/2 sockets. Just a little more snug. The icing on the cake was the warning before dumping the transmission oil everywhere. I would have definitely missed that step.notoptoy wrote: ↑Sat Oct 05, 2019 11:42 pm Very cool, glad you could put the guide to use! I should probably update that with the corrected bits I have since added, plus I have a 5 speed instead of a 4 speed so the driveshaft removal is a bit different. Congrats on getting it out and to the next step in your project!
Thanks again.
“Life is too short and unpredictable to play it safeâ€
-
dynaguy

- Roadster Fanatic-Site Supporter
- Posts: 1218
- Joined: Wed Jan 01, 2003 3:27 pm
- Location: Colton, Wa
Re: Steps by step engine removal guide
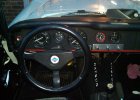
Good idea to have the car upside-down......Everything should've just fallen out..... 
-
Karr
- Roadster Nut
- Posts: 31
- Joined: Thu Sep 26, 2019 4:17 pm
- Location: California
- Model: 1500/1600
- Year: Low Windshield-64-67.5
Re: Steps by step engine removal guide
Thats so strange. The picture I took on my phone is correct and if I view the post from my phone it's right side up. But if I view it on my computer the picture is upside down. Hmm...
“Life is too short and unpredictable to play it safeâ€
-
notoptoy
- Vendor-Site Supporter
- Posts: 9677
- Joined: Fri Oct 02, 2009 2:55 pm
- Location: Winston-Salem, NC and Ocala, FL
- Contact:
Re: Steps by step engine removal guide
I am guessing you took the picture with an iPhone. It's a quirk with Apple and "the rest of the world", at least on this forum.
"When all else fails, force prevails!" Ummm, we're gonna need a bigger hammer here.
67.5 SPL311 H20 w/5 speed
65 Impala Convertible
2017 C43 AMG
67.5 SPL311 H20 w/5 speed
65 Impala Convertible
2017 C43 AMG
-
Karr
- Roadster Nut
- Posts: 31
- Joined: Thu Sep 26, 2019 4:17 pm
- Location: California
- Model: 1500/1600
- Year: Low Windshield-64-67.5
Re: Steps by step engine removal guide
You are correct. That’s annoying. I’ll try posting pics from something different from now on.
“Life is too short and unpredictable to play it safeâ€