S15 SR20DET Turbo Swap -- Spriso Motorsports

Discuss engine swap details here!

Moderators: notoptoy, S Allen, Solex68

Post Reply
User avatar
spriso
Vendor
Posts: 1573
Joined: Wed Jun 04, 2003 9:20 am
Location: Oregon
Contact:

S15 SR20DET Turbo Swap -- Spriso Motorsports

Post by spriso »

James' S15 SR20DET Engine Swap by Spriso Motorsports

Image

I thought that some of you might be interested to see what the crew at Spriso Motorsports has been working on this winter. This is James' 1967 Datsun 1600 roadster. James has owned this car for about a year and a half and decided that he wanted to make it is own

I originally built this car a few years ago for a different customer. He wanted a turbocharged SR20DET engine and a full frame off resto-mod conversion done to the car. Unfortunately, the previous customer also insisted on an automatic transmission, which really did not compliment the rest of the car.

Still, the customer is always right, and the automatic was installed. This involved building a new transmission tunnel, and a new x-member to clear the gigantic automatic transmission and all of its assorted plumbing (trans cooler, etc.)

When James bought the car, he came up with a laundry list of things that he wanted changed, and of course he wanted the automatic out of the car (and who can blame him!) and a host of other modifications done to make it his own unique ride. Well, our schedules finally meshed, and we started on this car in November of last year.

Here are some before shots taken the day before the car was stripped down:

Image

Image

Image

And most important, what the engine compartment looked like:

Image

Image

The car is a classic, narrow bodied 67 roadster. It lived most of its life in Arizona and was parked in 1974. The car has zero rust and does not appear to have ever had any accident damage.

The previous owner wanted the car painted Plymouth Prowler orange, and at first this seemed like a terrible mistake, but once the car was complete with the chrome and stainless on it, the color works quite well and the car gets lots of compliments wherever it goes.

So, what are we going to do to this beautiful roadster?

Here is the laundry list:

-S15 SR20DET with 6-speed transmission (250HP stock!)
-16" wheels with 225/40/16 rear tires (under stock rear sheet metal!)
-New Ron Davis radiator
-New Forge intercooler
-All new intercooler plumbing
-All new mandrel bent stainless exhaust
-Wide flare front fenders
-LSD rear axle with rear disks

And a host of other new and improved items that you will read about in the next few months.

Of course, I will update this thread when we have time detailing all the details that make a SR turbo powered roadster special!

Sit back, get comfortable and follow along-- this is going to be a fun ride!

Michael Spreadbury
Spriso Motorsports
Last edited by spriso on Tue Jan 16, 2018 9:30 pm, edited 5 times in total.
Spriso Motorsports
http://www.spriso.com
Instagram https://instagram.com/spriso/
SR20 Powered Roadsters
Engine swap kits Available! See my website!
User avatar
spriso
Vendor
Posts: 1573
Joined: Wed Jun 04, 2003 9:20 am
Location: Oregon
Contact:

Post by spriso »

Image
Last edited by spriso on Tue Jan 16, 2018 9:31 pm, edited 2 times in total.
Spriso Motorsports
http://www.spriso.com
Instagram https://instagram.com/spriso/
SR20 Powered Roadsters
Engine swap kits Available! See my website!
User avatar
S Allen
Site Admin
Posts: 4547
Joined: Thu Dec 05, 2002 4:57 pm
Location: Knoxville, IA(Lake Redrock)Emory, TX
Model: 1500/1600
Year: Low Windshield-64-67.5
Contact:

RE: S15 SR20DET Turbo Swap -- Spriso Motorsports

Post by S Allen »

Michael,

Your shop puts out some very incredible work. Thanks for sharing. Very tidy looking installation as is the standard for you. I am drooling.

Steve
66 Stroker-Going Orange
67 SRL311-00279-resto project
Stock '72 240Z-Blue
2002 Ford F250 7.3 Diesel 2WD Hauler
2008 Toyota FJ Cruiser
2009 Smart ForTwo Passion Coupe
2013 Fiat 500 Abarth
User avatar
Datrock
Roadsteraholic
Posts: 926
Joined: Fri Feb 14, 2003 1:25 pm
Location: Oregon

Post by Datrock »

Michael...are you hiring??...LOL...Just kidding.. I have actually had the chance to drool over this car a few times while I was in the neighborhood, I very was carefull, and it is an unbelievable car. I hope to see it again soon. See ya then... Bill
User avatar
Blinds04
Roadster Nut
Posts: 36
Joined: Tue Apr 04, 2006 5:04 pm
Location: Arcadia,CA

Post by Blinds04 »

The interior pic shows an auto shifter but the trans is manual?

Oh, didn't read it well enough.

Previously was an auto, changed to a manual.

Got it.

I hope mine comes out half as nice as this.

Brake lines go into the body and back under. Interesting.

Just beautiful.

One question, what bypass valve are you using and is it recycle(appears to be)?
Brian

Sleeping Beauty - 67.5 S14 SR20DET project
alp
Roadster Fanatic
Posts: 148
Joined: Sun Dec 19, 2004 8:08 pm
Location: Vancouver,BC

Post by alp »

why the motor swap if it already had a detailed SR20det? Is there a big difference between a motor with a manual transmission stock or an automatic?
User avatar
spriso
Vendor
Posts: 1573
Joined: Wed Jun 04, 2003 9:20 am
Location: Oregon
Contact:

Post by spriso »

Brian wrote:
One question, what bypass valve are you using and is it recycle(appears to be)?
The bypass valve (aka blow off valve) in the original swap was from a Mitsubishi Evolution, and yes, it was plumbed back into the intake so the car would run properly.

The new setup will have a bypass valve from JGS Turbo, which has billet construction and looks to be very high quality.

Michael
Spriso Motorsports
http://www.spriso.com
Instagram https://instagram.com/spriso/
SR20 Powered Roadsters
Engine swap kits Available! See my website!
User avatar
spriso
Vendor
Posts: 1573
Joined: Wed Jun 04, 2003 9:20 am
Location: Oregon
Contact:

Post by spriso »

Alp wrote:
why the motor swap if it already had a detailed SR20det? Is there a big difference between a motor with a manual transmission stock or an automatic?
James wanted the latest version of the SR engine for his car, and the S15 version is it. There was nothing wrong with the old setup, but having 60+ more HP does not hurt either!

The automatic S13 SR20DET engine is rated at 190 hp instead of 205 for the 5-speed version, so we should see a very good performance difference!

Michael
Spriso Motorsports
http://www.spriso.com
Instagram https://instagram.com/spriso/
SR20 Powered Roadsters
Engine swap kits Available! See my website!
User avatar
spriso
Vendor
Posts: 1573
Joined: Wed Jun 04, 2003 9:20 am
Location: Oregon
Contact:

Post by spriso »

Now for the fun stuff-- mounting the turbo!

Image

When I built this car originally, I went to great lengths to get the stock S13 T25 turbo to fit under the stock steering shaft (aka death spear) so it would look as original as possible, and to keep the heat away from the hood and the brake master cylinder so we would not cook the brakes.

It takes a great deal of work to get the turbo to clear everything and there is just enough room to make it all fit! think building a ship in a bottle and you get the idea.

Most people who install SR20DET engines into their roadsters top mount the turbo. This is considerably easier plumbing wise, clears the steering, and can look quite sexy when done right.

The S15 SR20DET uses a T28 ball-bearing turbo instead of the T25 found on the S13 engine. This has a larger compressor housing that is quite a bit larger than its predecessor. This larger compressor housing makes it nearly impossible to fit the T28 under the steering shaft without serious modification or u-joint monkey motion.

We did not want to deal with that, so we decided to go with a top mounted turbo. I feel with appropriate heat shielding and dedicated fresh air, we can maintain the paint on the valve cover as well not cook the master cylinder, even with the larger T28 turbo.

Because we still have a solid steering shaft going through the left side of the engine compartment, we cannot use any of the commonly available aftermarket exhaust manifolds on the market, nor use the stock manifold. We have to build something custom.

This actually works out well as we can then place the turbo exactly where we want it. JGS Turbo makes a blank "log" manifold that allows you to cut exactly where you want to mount your turbo flange. Their kit comes in at just under $300 and gets you a fully-welded exhaust manifold and flange kit. You can see an image of what they do here:

Image


Since the turbo is going to be top mounted, it needs to be "reclocked", which means that the snap ring on the compression side of the turbo needs to be removed to allow you to rotate the housing to get it pointed in the right direction.

The exhaust housing needs to be rotated as well. The four "½" bolts need to be loosened to allow the turbo housing to be rotated to suit your application. (I will add some photos of these this weekend!)

When clocking the turbo, you need to pay particular attention to the oil and drain sections of the turbo. The oil feed needs to go on top, and the drain rotated straight down as it is a gravity feed drain.

Once the turbo has been re-clocked, you can figure out how it is going to fit on the manifold. What I wanted to do was to figure out what was a natural placement of the turbo with the down pipe (exhaust) attached.

Using a 2.5" 304 stainless bend from Burns Stainless, and a stainless exhaust flange from Focussport, I was able to sort out how much room I needed to get the exhaust placed to where it had ample air room, good clearance to the firewall, and still had a natural curve.

Image

Image

This is a shot of the down pipe completed, but shows the general idea. What you want is to split the difference in room between the engine, brake master cylinder, firewall, steering shaft, etc. and not add any bends (if possible!)

As it turned out, the flange for the turbo would need to go right in the middle of #2 and #3 cylinders (right where you would want it to be!) The manifold was cut with the plasma cutter and the flange mocked up. I mounted the turbo at a little bit of an angle to compliment the exhaust down pipe and to aim the turbo compression housing a little more to the frame rail (just by a few degrees).

Here is what everything looked like when I was done:

Image

Another side view:

Image

We will cover the down pipe next!

Michael Spreadbury
Spriso Motosports
Last edited by spriso on Tue Jan 16, 2018 9:42 pm, edited 8 times in total.
Spriso Motorsports
http://www.spriso.com
Instagram https://instagram.com/spriso/
SR20 Powered Roadsters
Engine swap kits Available! See my website!
User avatar
spriso
Vendor
Posts: 1573
Joined: Wed Jun 04, 2003 9:20 am
Location: Oregon
Contact:

Post by spriso »

Down Pipe

Image

We have covered part of building the down pipe from the back of the turbo housing, but this post should cover the subject in more detail.

Because we have rotated the turbine housing 180°, we can no longer use the factory down pipe that came with the turbo, nor can we use any of the common aftermarket down pipes that are available for the SR engine.

So we have to build our own. Using the Focussport stainless flange shown above, we can now start to thread the 2.5� exhaust out from the turbo, around the steering shaft, and down to the exhaust holes in the X-member in the frame.

The exhaust leaves the turbo housing in 2 ¼� hole, so a transition needs to be used to upsize the pipe to 2 ½�. Burns Stainless makes such a transition, and it was put in the lathe to make it fit for our application.

Here you can see how the size flares up from 2 ¼� to 2 ½� where is it is joined by the mandrel bend making its bend down.

Image

Now, we need to wrap around the steering shaft with a few cuts of mandrel pipe like this:

Image

If we pull the steering shaft out of the way, it gives a better view how we wrap the pipe around the shaft, and this shot shows the V-band flange and how is sits really nicely in the relief of the engine block, out of the way of everything, but still easily accessible through the inner fender:

Image

Here are a couple shots from down below that show how the exhaust threads around the steering shaft and then makes the transition to the flex pipe in the x-member. (The frame rail will be cleaned up once we pull the engine back out of the car again…)

Image

Image

And here is a shot of the entire down pipe assembly outside of the car:

Image

Scratch that off the list! :lol:

Michael Spreadbury
Spriso Motorsports
Last edited by spriso on Sun Feb 20, 2011 11:21 pm, edited 1 time in total.
Spriso Motorsports
http://www.spriso.com
Instagram https://instagram.com/spriso/
SR20 Powered Roadsters
Engine swap kits Available! See my website!
User avatar
ppeters914
Roadster Fanatic-Site Supporter
Posts: 3082
Joined: Mon Jun 28, 2004 5:51 pm
Location: Lake Forest Park, WA (just north of Seattle)
Model: 1500/1600
Year: Low Windshield-64-67.5

Post by ppeters914 »

Prowler Orange? Was this the Wild Bill car? Didn't realize it had an automatic. Will it be ready for Canby?

Sheer artistry........ :smt023
Pete
-------------------------------------
'67 1600 - frame off started in 2014. Now I know why roadster projects take so long. What a stupid idea. :smt021
'66 1600 - parts car
'66 WPL411 ***SOLD***
A couple of Porsches, a RAV4 Hybrid, and a motorcycle
User avatar
datsunrides
Roadster Fanatic-Site Supporter
Posts: 1571
Joined: Sun Apr 25, 2004 7:15 pm
Location: Roseburg, Or

Post by datsunrides »

Sweet work. I can admire the amount of work it takes to do custom work like this. It should give you a great sense of satisfaction in doing quality work like this. Can't wait to see the inlet plumbing!

Mark
1966 Roadster
Turbo / EFI U20 (T25 w/ SDS EMU.)
User avatar
Dave
Turbo Powered
Posts: 657
Joined: Fri Aug 01, 2003 12:24 am
Location: In the refrigerator, to the left of the mayonnaise, behind the pickles and beer.

Post by Dave »

I feel with appropriate heat shielding and dedicated fresh air, we can maintain the paint on the valve cover as well not cook the master cylinder, even with the larger T28 turbo.
Indeed, you certainly can. :wink:

Going on 2 years now with my top mount T28 (at 12 PSi) and no problems to report. The combination of a heat shield around the MS and an 12" square patch of that DEI heat reflective material stuck to the underside of the hood seems to do the trick. The MS is cool to the touch after a long cruise, as is the top of the hood.
Dave Kaplan

68 2000 Roadster - Now with GT2560R power!
SR20-DET: 223 rwhp, 222 lb-ft.

http://www.cardomain.com/ride/698904
User avatar
spriso
Vendor
Posts: 1573
Joined: Wed Jun 04, 2003 9:20 am
Location: Oregon
Contact:

Post by spriso »

Intercooler plumbing: Think outside the box!

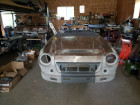
Now that the engine and transmission are sitting on their new mounts, the turbo is mounted, and the exhaust through the x-member, it is time to concentrate on building the turbo plumbing from the turbo to the throttle body.

Lets start with the air filter assembly, as this is where the air enters the intake system. Since the roadster engine compartment is very small, there is not much room to install an air filter. We need to be aware of what the intake plumbing is going to have to do to run through the intercooler and we need to leave adequate room for the radiator and over flow bottle.

We also need to put the air filter in a location where it is easy to service and monitor when it needs cleanings. It also needs to be in a location where it is somewhat protected from road debris and water.

When I originally built the car, I had the filter in the engine compartment and that seemed to work out well, so we just re-designed the mount a bit for a new air filter assembly that would work out the packaging a little better.

Image

This is a free-standing air filter bracket attached to a modified MAF housing to shorten up the whole assembly about ¾�. Here is what the bracket looks like without the filter:

Image

Why was the MAF housing shortened you ask? We took a little length out of it so we would gain even more length between the MAF assembly and the turbo itself. When the air filter is too close to the turbo, turbulent air can cause metering issues with the MAF causing running issues.

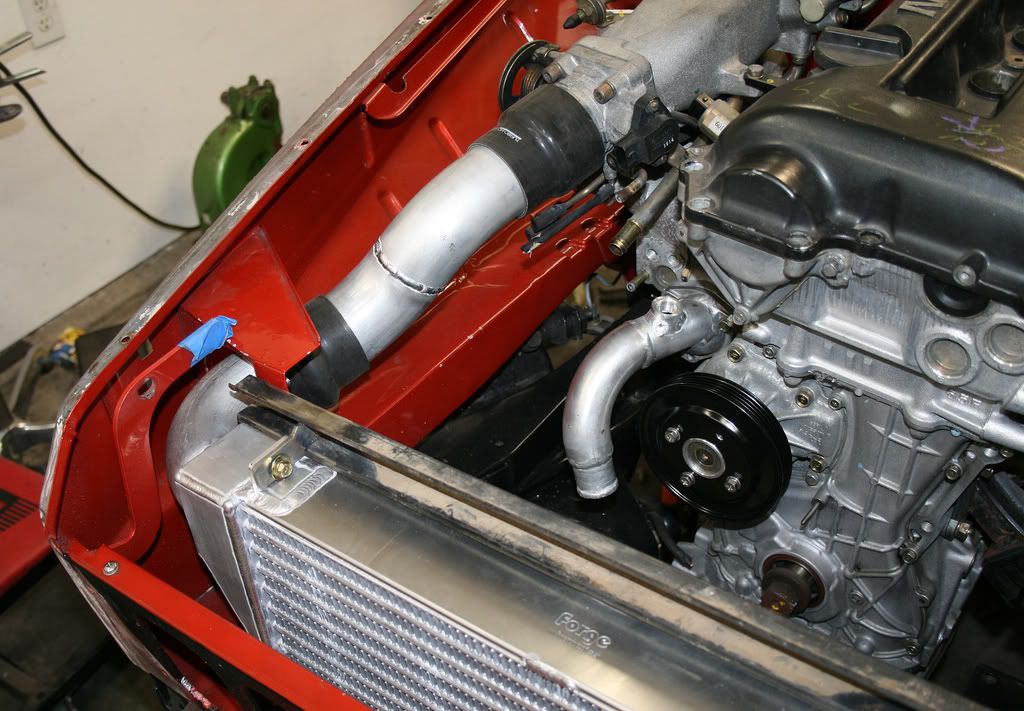
Here is the MAF/Air filter assembly tucked up nice and tight to the core support:

Image

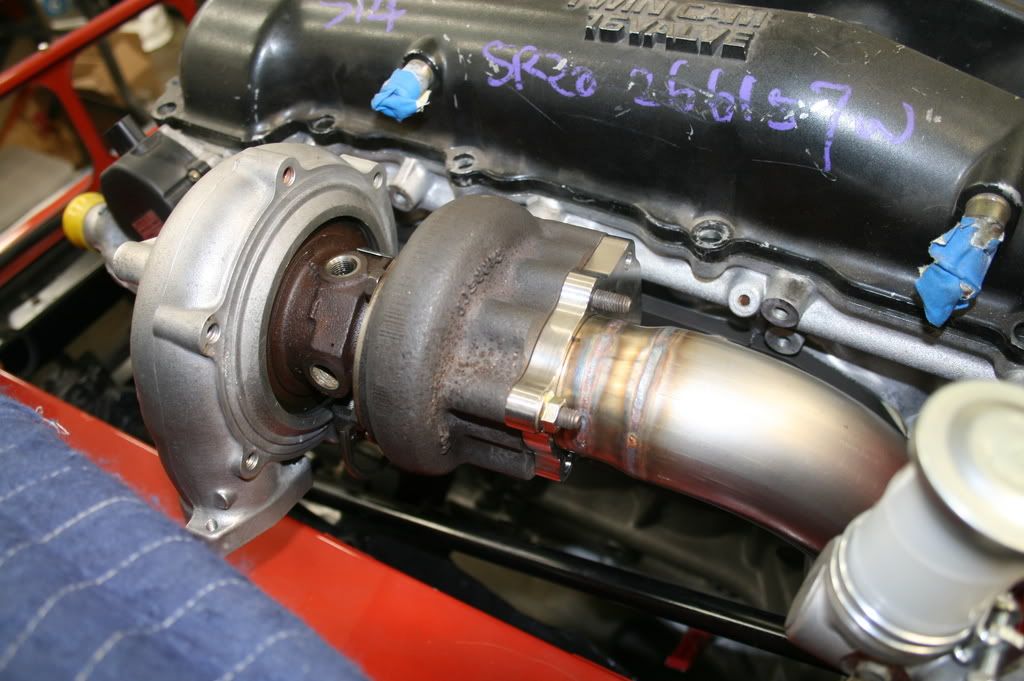
Now that we had the MAF/air filter assembly sorted out, we can build the intake tubing which is a couple simple 2.5� 45° mandrel bends going to the turbo assembly. You can also see the new HKS wastegate actuator mounted on a custom bracket just to the left of the turbo:

Image

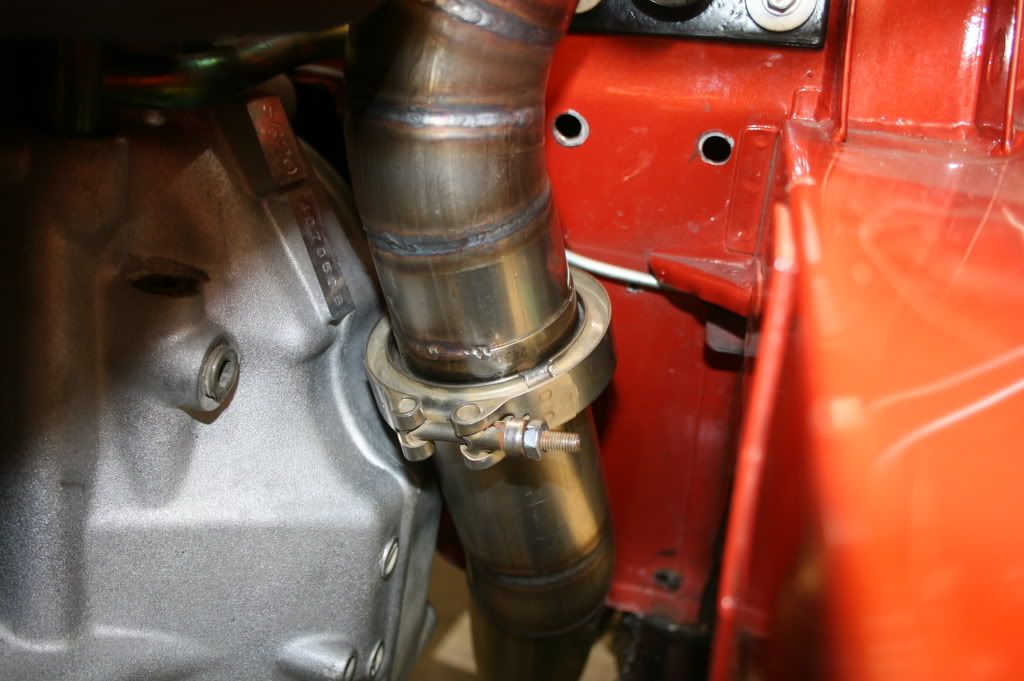
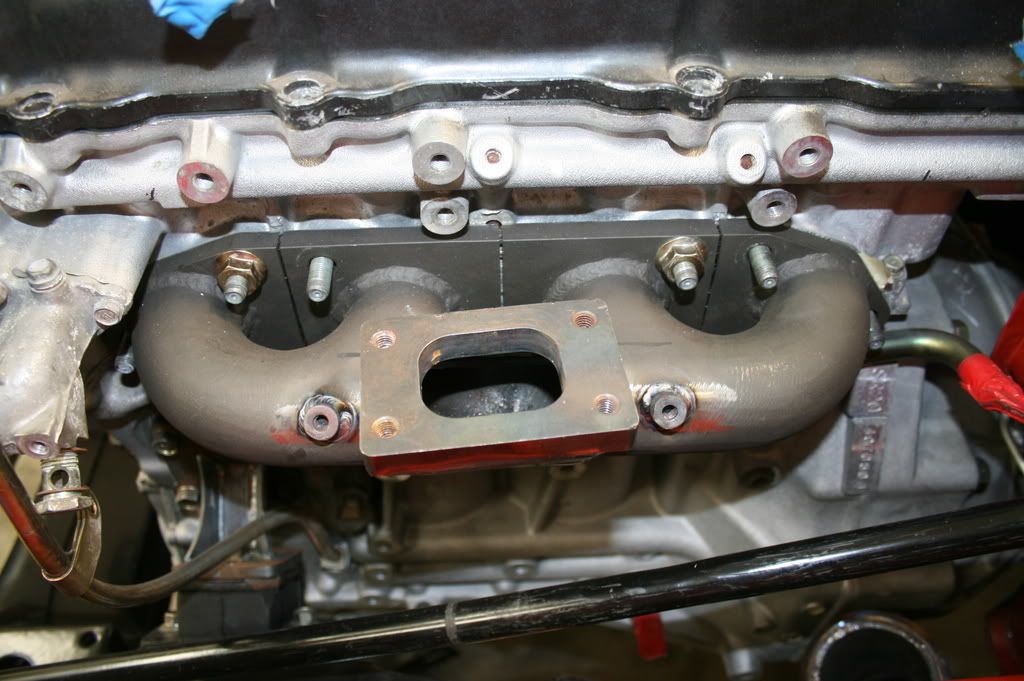
Where is that turbo plumbing going out of the turbo? Well, sometimes when you do a turbo swap like this, you need to think outside the box…

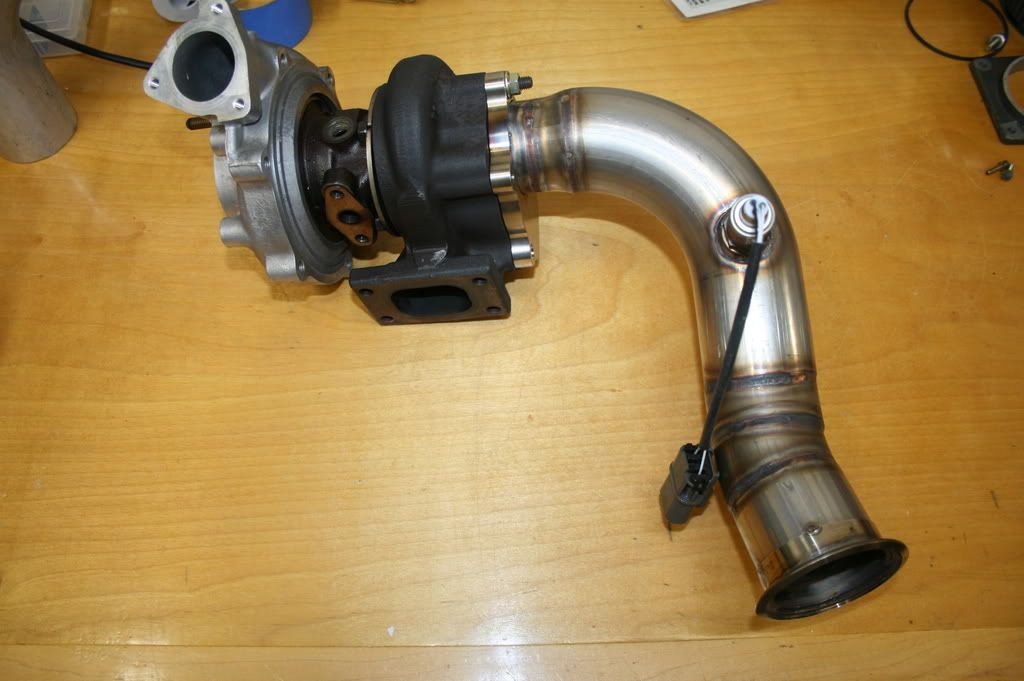
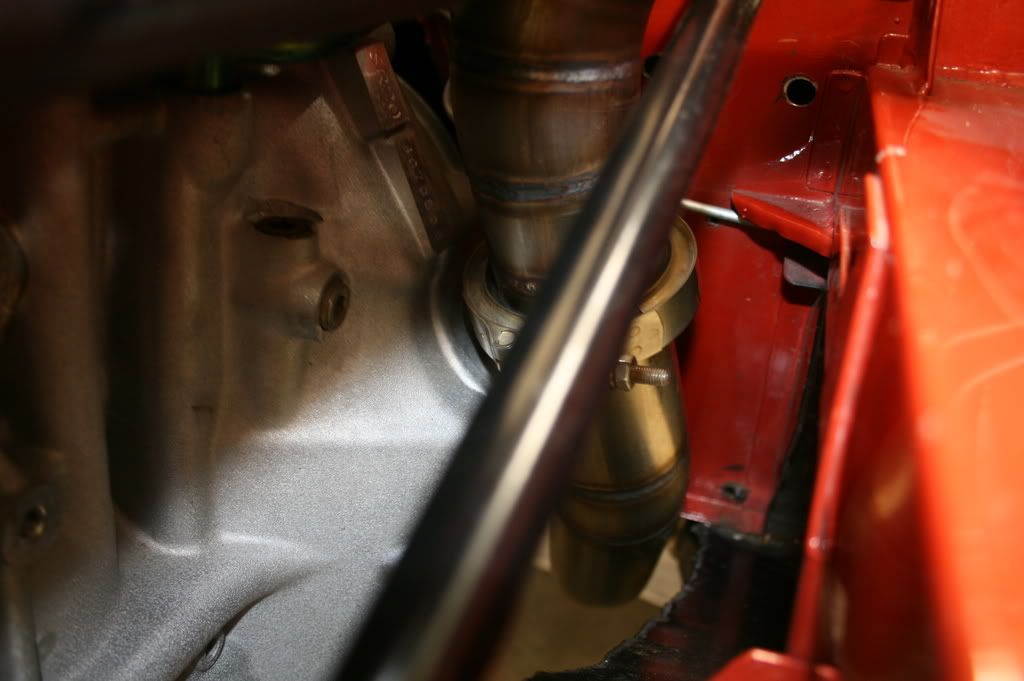
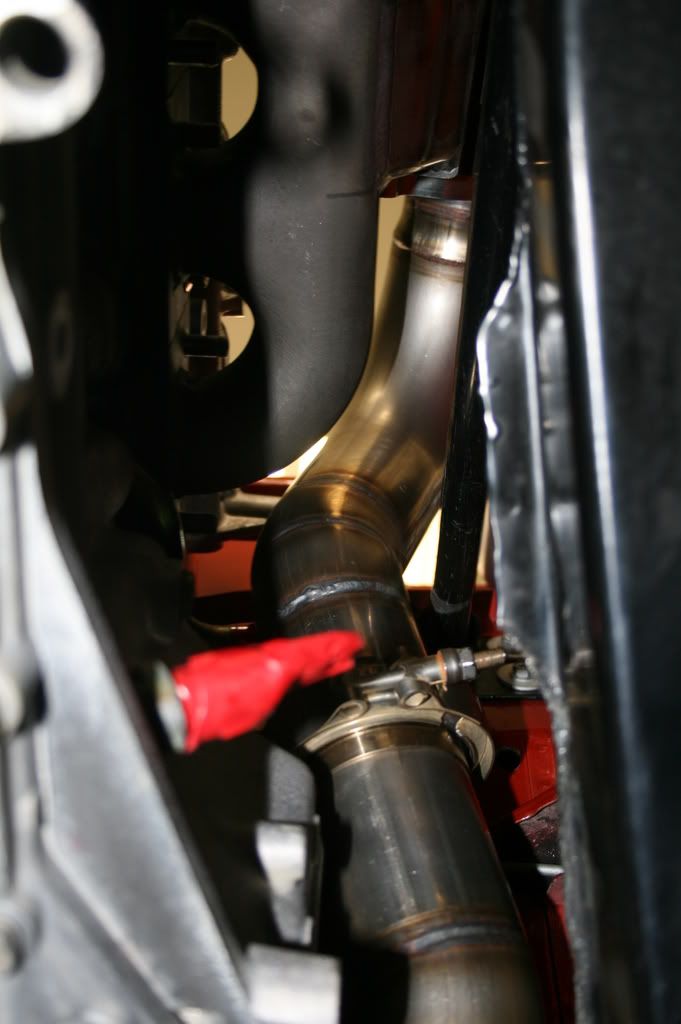
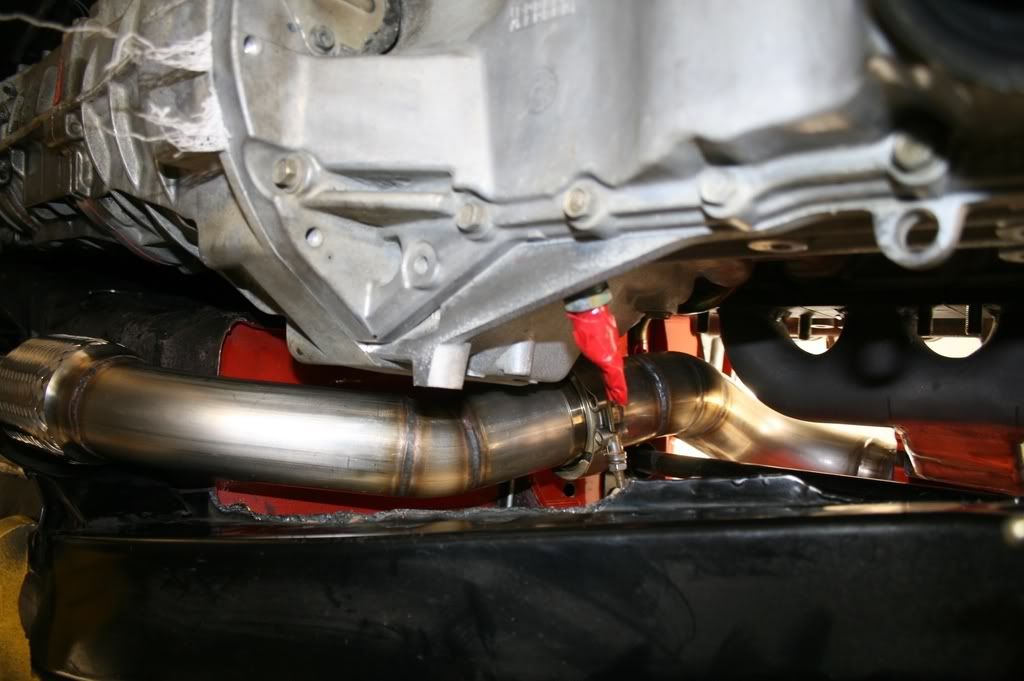
Here is the turbo plumbing as it leaves the turbo and goes towards the intercooler (yes, it is still being mocked up in the photo, but it gives you an idea how it is going to be run):

Image

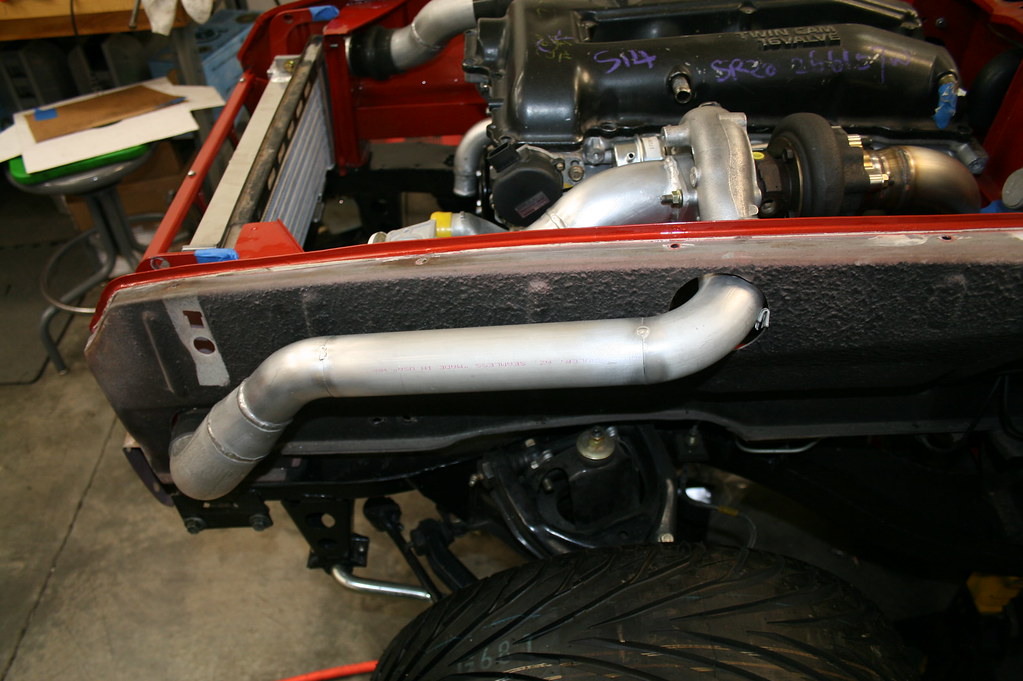
The tubing as it leaves the turbo is 2", and transitions to 2.5" before it makes the bend to enter the intercooler (and yes, it clears the headlight bucket and inner fender!):

Image

Ahhh, the intercooler! Dave had great luck with his Forge intercooler and they certainly appear to be very high quality. I spent a fair amount of time on their website and ordered a “type 8� intercooler thinking that this would do the trick:

Image

The passenger side outlet looked like it would work out perfectly, as I had originally ran the intercooler plumbing through this hole in the radiator core support:

Image

All I would have to do is cut off the existing flange and weld in a 120° bend to get the plumbing going up towards the throttle body.

It was the drivers side that did not work out as planned. Since we decided to mount the air filter on top of the frame rail, I no longer could run the intercooler plumbing through the left side radiator core support as I had originally done it with the S13 engine.

Since we were going outside of the inner fender on the plumbing, the left side tank would need to be cut off and flipped 180° and re-welded back on. This is not as big of a deal as it sounds, we cut the tank off, and I got busy with the TIG welder re-attaching it in the new orientation. When we were done, the tank looked like this:

Image

If you decide to use a Forge intercooler in the future, save yourself the heartache and order a TYPE 9 and you will be good to go! I just did not have the 4-6 weeks waiting time to wait for a replacement as we need to get this car done!

Image

Here is a link to Forge Motorsport: I highly recommend them!

http://www.forgemotorsport.com/content. ... MINT104UNI

On the other side of the intercooler it was back to the bandsaw again to cut off the straight 2.5" flange. We then fit a 120°, 2.5" bend that poked through the core support towards the throttle body. Then two, 45° bends make a gentle arc to the throttle body. Clean and simple.

Image

You can also see how the intercooler is mounted on the top-- just a nice simple tab going to the existing tab on the top of the intercooler.

I still have to plumb the blow-off-valve to the intake, the valve cover breather to the intake, finish welding the inner fender intercooler plumbing, and make mounts for the inner fender plumbing, but this post should give you an idea how we packaged this setup in an efficient, clean package with minimal bends and a super-clean appearance. When it is all done, it will go to the polishers to get polished with new hoses and clamps, but I figured you would like to see the build as it was done last weekend...

Comments and questions are always welcome!

Michael Spreadbury
Spriso Motorsports
Last edited by spriso on Tue Jan 16, 2018 7:04 pm, edited 4 times in total.
Spriso Motorsports
http://www.spriso.com
Instagram https://instagram.com/spriso/
SR20 Powered Roadsters
Engine swap kits Available! See my website!
User avatar
Blinds04
Roadster Nut
Posts: 36
Joined: Tue Apr 04, 2006 5:04 pm
Location: Arcadia,CA

Post by Blinds04 »

I have a couple of question. Sorry, you'll probably be annoyed of me since I'll probably be asking a lot of questions.(I'm attempting the s14 sr20det) I can PM you if the members get sick of me.

What are the two extra bungs you welded onto the manifold? I'm guessing its for extra support brackets for the top mount turbo.
Image

My second question is what bung did you use for the thermostat housing which i'm assumming is for the electric fan switch. Also what fan switch are you using and where did you get it?
Image

Once again, AWESOME build.
Brian

Sleeping Beauty - 67.5 S14 SR20DET project
Post Reply